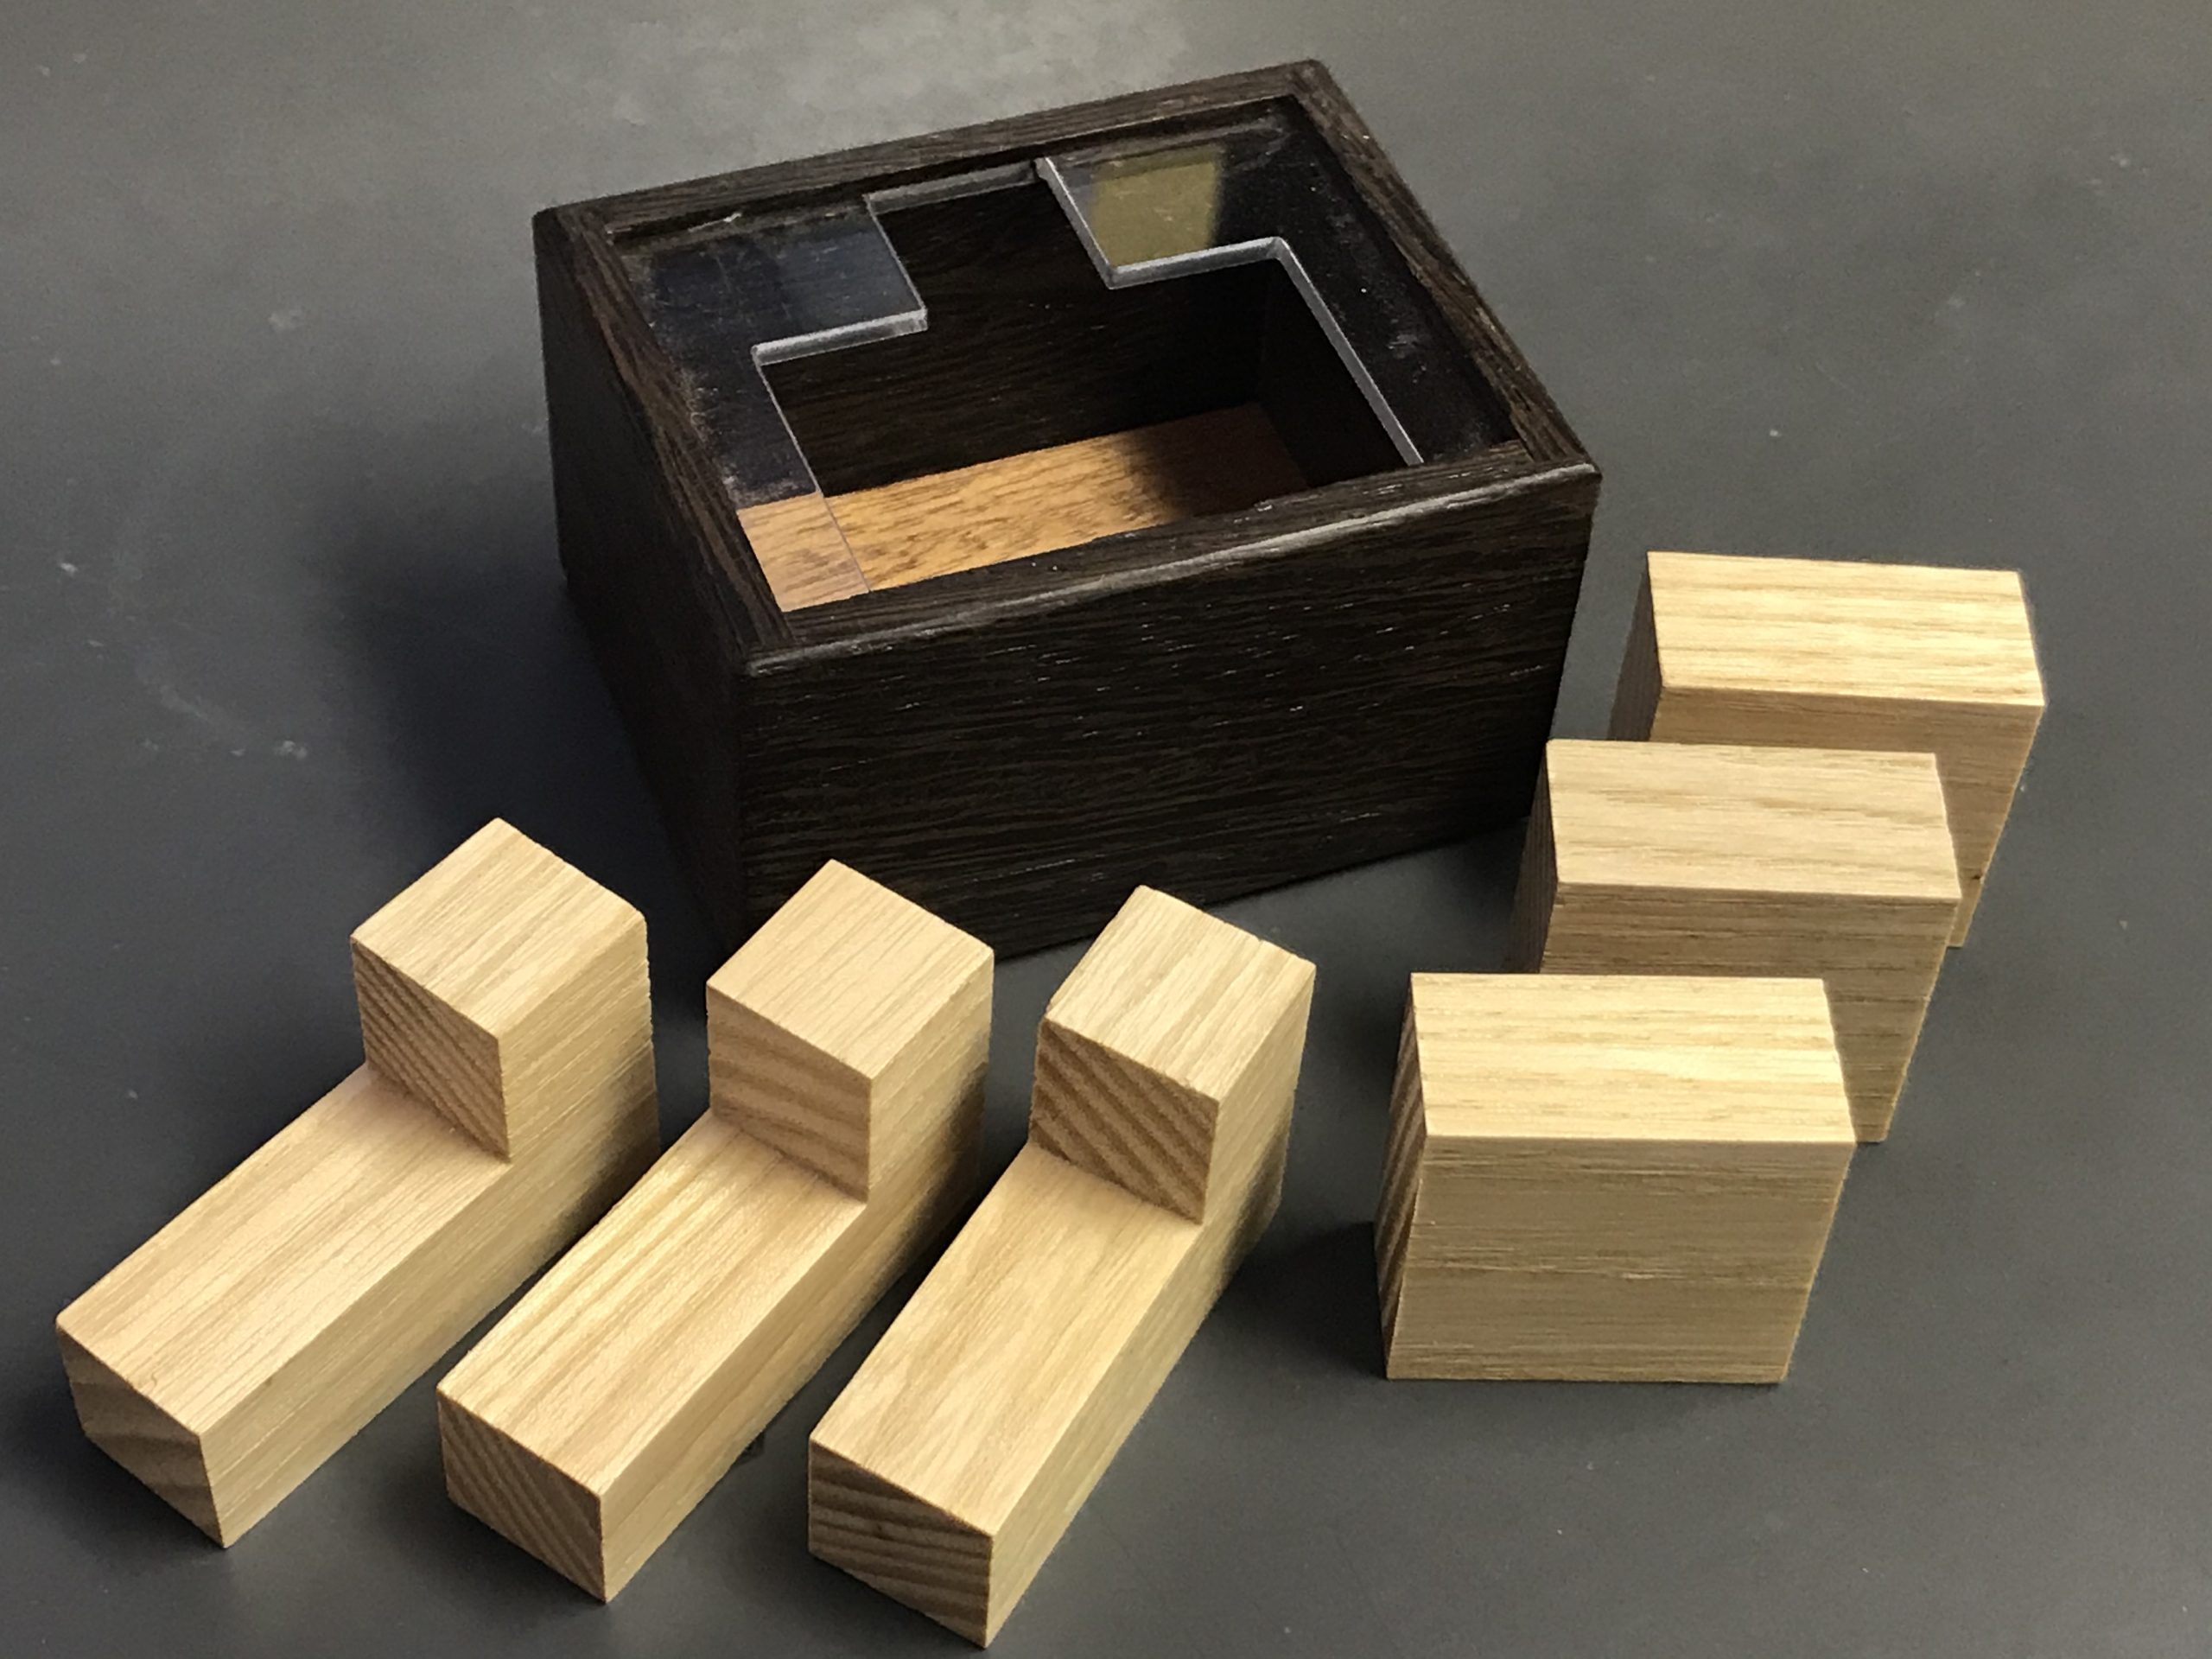
RAYA BOX No. 1 – Yavuz Demirhan

Today, I have a wonderful packing puzzle from Yavuz Demirhan. It’s the first puzzle I’ve worked on from Yavuz, but it certainly won’t be the last. (EDIT: I’m wrong – one of my favorites, Octo Cube was designed by Yavuz – you can read that post here) Raya Box No. 1 is the first in a series of 7 Raya packing puzzles available at his Etsy Store HERE.

These puzzles come from Turkey, so be prepared to wait a while if you order from his store. I placed an order on February 1 and just received the box yesterday – so it took a little over a month to arrive. It’s worth the wait though. These puzzles are inexpensive, but still well made and very fun to solve. I also ordered No. 2 and No. 7, though I have yet to even unbox those.

Pack it up, pack it in.

This packing puzzle consists of a rectangular box with restricted openings. There are 6 pieces that must be placed inside the box – 3 “L” shaped pieces and 3 square pieces. The puzzle also comes with a storage bag. I really like that the bag and the box both have the puzzle name on them. This greatly helps my organization. As my collection grows, it becomes difficult to remember the names of the puzzles and the designers – I usually end up searching my emails for receipts or the archives of various puzzle websites to re-discover the name and/or objective of puzzles that I have neglected or forgotten about.

It took me about an hour to solve this one, and I usually struggle with packing puzzles, but for some reason, this one felt very approachable.

I began by trying to assemble the pieces into the required shape outside the box. Most times, with these packing puzzles, I can flip the box over and assemble on the bottom. The edges of the box keep the pieces constrained to the correct dimensions and I find this easier than assembling on a table.

After a bit of struggle, I managed to find a configuration that was the right size and shape. Yay, I thought. Now, I just had to put the pieces into the box. I tried a few times, but it quickly became apparent that the pieces would not fit in this configuration. That darn restricted plexiglass opening wouldn’t allow the pieces to go in as I wanted. I tried flipping the whole shape over to see if they would go in that way. No luck. I persisted for a while, but eventually, I had to give up and go to bed.

One of the many configurations available.

The next day, I tried again. This time, I decided to see if there were any more ways to make the required shape. Ah ha! I found another way to make the cube and once again tried to fit the pieces into the box. And once again I failed. But, I felt I was on to something. The restricted opening makes it clear that the square piece will have to go in last – there just isn’t room for the final piece to be an “L” shaped block.

Back to the drawing board, I took the last configuration and altered it slightly. I could envision how it was going to work if I could just get the first few pieces in correctly. Sure enough I found a way and YES, it worked! That was pretty cool.

No spoilers here. Blurred for your safety.

I’d call this one a moderately difficult packing puzzle. It’s not easy by any means, but it isn’t super tricky either. I think a novice puzzler with enough time would be able to figure it out and an experienced packer could get it done in under an hour – maybe quicker if they really thought about it instead of just trial and error.

If you haven’t already, please check out Yavuz’s Etsy page. As I type this, there are still a number of puzzles available.

Okto Cube – Yavuz Demirhan

Today, we have another beauty from Eric over at Cubicdissection.com. This one is called Okto Cube and was designed by Yavuz Demirhan. This particular puzzle immediately caught my eye when it was listed, and I was very excited to work on it. I love the looks of it and it was equally fun to manipulate and discover it’s secrets.

This is a six piece board burr encased in an eight piece cube. The cube pieces are made out of solid wood which gives this puzzle an overall weight that is pleasing and the boards are well made and strong.

Solving this puzzle took a while. I brought it with me on Thanksgiving vacation, hoping that I would have some quiet evenings to work on it. Well, I didn’t have many quiet evenings, but I did get to work on it extensively, which was great.

I had played with this puzzle a handful of times before I made any real progress. I could move a few of the burr pieces, but always hit the same dead end. Eventually, I discovered that it wasn’t a dead end after all. Once in the “dead end” position, I found that the signed burr piece could move freely. I had missed this move because its quite easy for the pieces to bind up a little. I often had to pull on board pieces to make sure they were fully extended before manipulating the next piece. It seems to loosen up after a bit of use, but is something to watch out for.

Once, the signed burr piece moved, I was then able to remove 2 of the cube pieces, which was a very cool (and scary) moment. I was expecting the puzzle to fall apart at this point, but that wasn’t the case at all, in fact, I had a long way to go.

The Signed board makes an appearance and one cube is removed.

Removing the 2 cube pieces revealed more of the interior and allowed me to see just how complex this puzzle is. There sure are lots of moving parts! I continued to manipulate the puzzle and was able to remove the first board piece. Soon after, I found that 2 more cubes were ready to fall off. Awesome! This thing is really fun.

4 cubes and a board removed. This puzzle is fun!

I continued to manipulate the parts feeling certain that I was close to the end. But no.. the puzzle still held secrets for me to unravel. I persevered and after a bit more manipulation and I removed 2 more cubes! I was now down to the final 2 cubes!

This is where things got really interesting for me. I was working on the puzzle in front of the tv, sitting with family, and I just didn’t have the focus I needed. I began to worry that I wouldn’t be able to get it back together again! I was hoping that the final 2 cubes would come off easily, but that wasn’t the case. I was having to do more movements than I could keep track of and I made the decision to stop and reassemble. Bah! I always seem to do this. Luckily, I was able to get the puzzle back together, but I was a bit ashamed that I didn’t finish it.

I ended my vacation and flew home defeated. I had come so close to the solution, but didn’t quite get there. 

Well, last night, I sat down, determined to redeem myself and finally solve this puzzle. I progressed through all the stages and once again found myself with the final 2 cube pieces attached to 4 burrs. I slowed myself down and analyzed the situation. There were a surprising amount of available moves and positions that I could find and eventually, I tried a combination of positions not previously attempted and voila! The 2 remaining cubes slid right off! Disassembling the final 4 burr pieces was not trivial either, but I got it done.

Okto Cube Disassembled

Whew! That was an awesome puzzle! 

But.. it wasn’t over yet. I still had to assemble the puzzle. Interestingly, I didn’t have much trouble on the assembly. I think that my aborted attempt during thanksgiving vacation had given me a better understanding of the moves required, and so assembly felt rather easy. I think the most difficult part was getting it started. For some reason, I seem to have trouble assembling the initial 4 burr pieces. But once that is complete and I had slid on the first two cubes, it was all downhill from there. 

I’ve since solved this puzzle a couple of times. I had to take some pictures and also wanted to better understand the mechanics behind it all. It is truly a remarkable puzzle and it is very repeatable once you understand the required positions. This is now one of my favorite puzzles! Check it out if you can!

Okto Cube looking all dramatic in the light

— SPOILERS BELOW. —