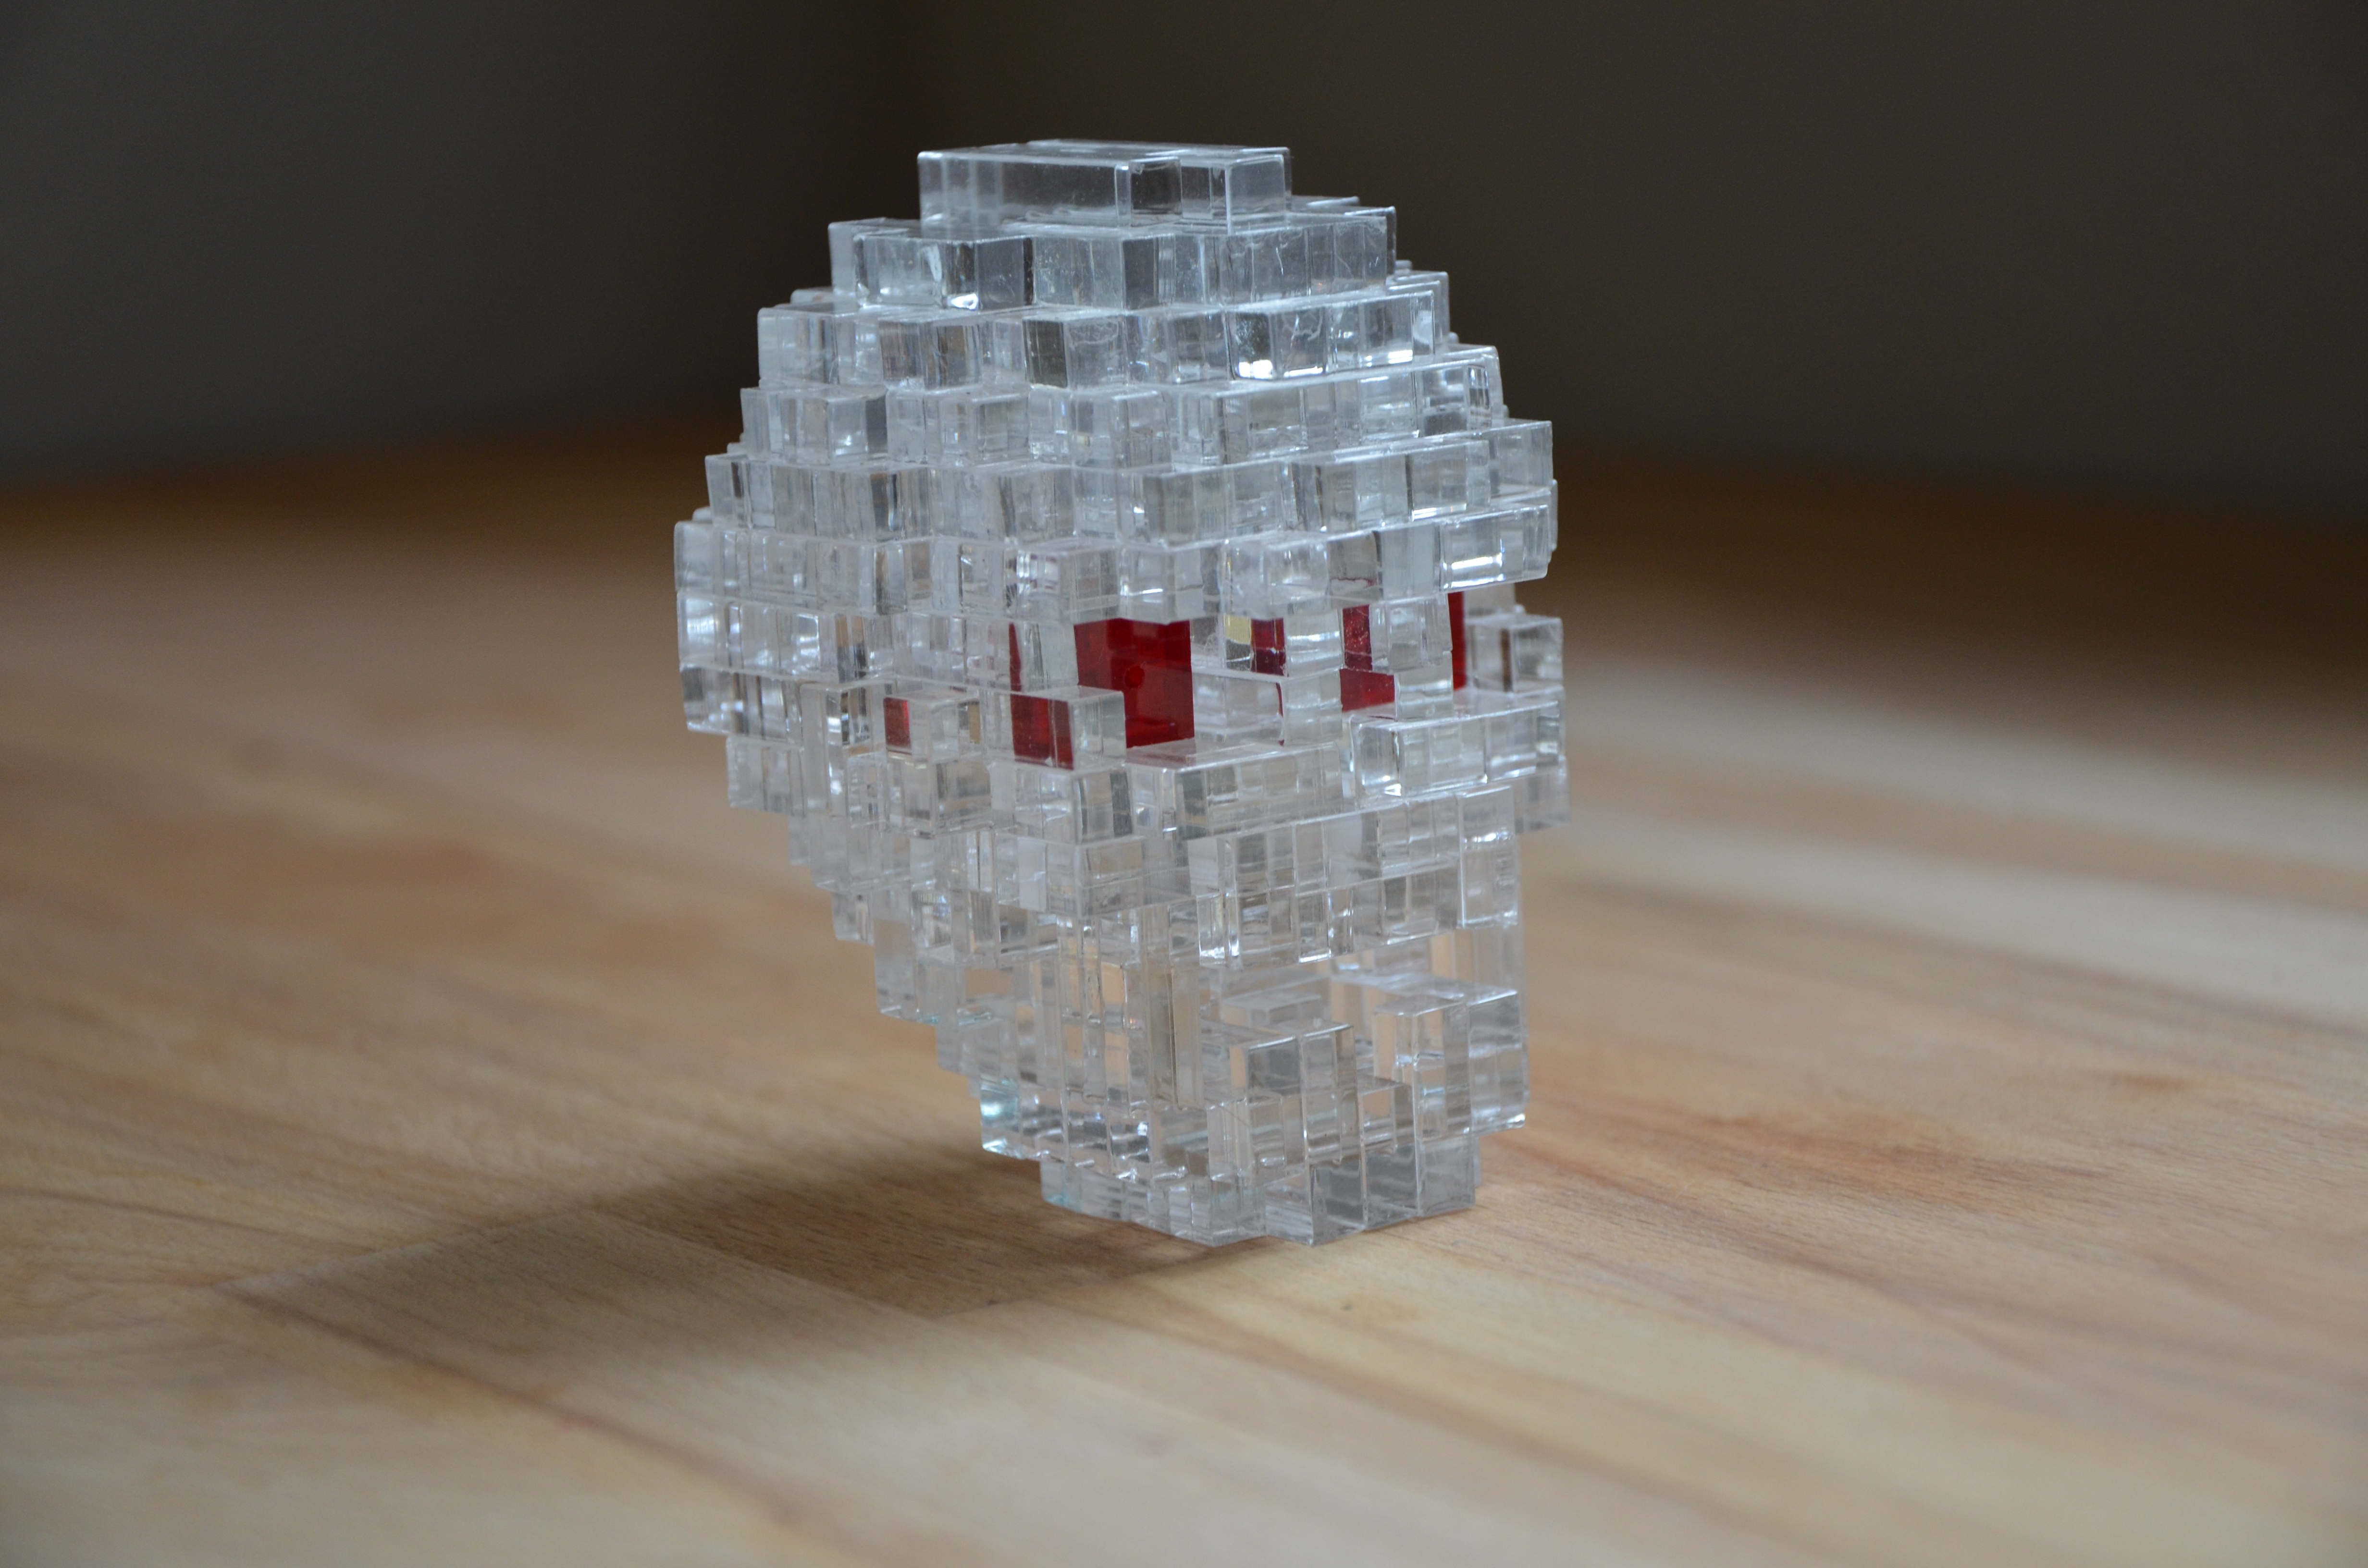
Cranium – Jerry Loo

Yes! I was one of the lucky 8 people to get my hands on this puzzle! I really didn’t know what I was buying, but when Eric Fuller releases a limited run puzzle, I have no choice but to pull the trigger and purchase it. It sounds like he is open to making more in the future, so those that missed out may have another chance to pick up this wonderful and unique puzzle.

To start – I’m super intimidated by this puzzle. There are a ton of pieces, limited pictures and no instruction on assembly, so it’s up to me to get the job done. Hopefully there is a logical sequence to things and enough clues for me to get it together. I’ve never worked on a puzzle like this, so I’m very excited to get started and see what I’m in for.

Holy crap there are a lot of pieces! I haven’t even begun to attempt this thing yet and I’m already feeling like there is no way I’ll get it solved. But hopefully my first impression is off and I can make some progress. Is this a solid puzzle? Or are there gaps in the skull? The 3 images on the cubic dissection site seem to suggest that it is a solid form. Also, I’ve noticed that one of the images holds some clues as to what pieces come out of the “face”. Ok. Here goes.

Lots and lots of pieces. Where do I even start?

Ok. I’ve spent the last half hour sorting pieces. I had to see what I was working with and there are over 50 pieces here, so step one seemed to be: Sort. And I think its been helpful. This puzzle is comprised of some very interesting pieces! There are large pieces that look like creatures out of the Space Invaders game and there are some tiny “T” shaped pieces. There are over 10 pairs of duplicate pieces and quite a few pieces that are not symmetrical – though a majority are symmetrical. There are no duplicate symmetrical pieces. What does all this mean? I don’t know… but I do have some theories starting to build. I think I’m going to start with the biggest pieces and see if I can’t get some sort of frame built.

Whelp, that failed horrifically and I’m not really sure what to do here. It’s not difficult to put pieces together, but it seems nearly impossible to know if those pieces are correct or not! I’d really like a better picture so that maybe I could identify where one of the bigger pieces goes. I think if I knew how one or two of the big pieces were placed I’d have a fighting chance. As is – I’m not sure how to proceed. But maybe I’m wrong, maybe I should start with a small cube and try to build larger? I’m really not sure how to approach this one..

And thus began my journey to find a better image to work from. I initially did some google searches which brought me to the Puzzle Will be Played site here. But, that didn’t really help, so I continued to search and ended up on Jerry’s Facebook page. And lo and behold I found a video of the Burr Tools file for Cranium. Yes! Awesome. Now I have something to work with! I watched the video, which showed the solution, though with so many pieces, I certainly wasn’t going to memorize the moves. So I went back to work to see watching that video would help me solve this one.

Nope. No help. I had to resign to the fact that I wasn’t going to solve this one by myself and so I decided to watch the video and follow along. The tricky part, though is that it was a video and not actually a burr tools file I was working with, so I was unable to rotate the puzzle and determining what pieces were going in was a matter of pausing the video at the right time. All this was challenging, but not impossible, so I persisted. But the another problem quickly emerged. The pieces in the video didn’t match the pieces in my puzzle! Some were close, so I made “Best guesses” But, I quickly came to a roadblock because the puzzle in my hands had a bunch extra pieces than the puzzle in the video. Gah! I wasn’t sure I’d ever get this thing together.

That’s when I sent a message to Jerry through Facebook and, Yes, he confirmed that the puzzles were different. Jerry offered to send me the burr tools file and I accepted. Well, that should be the end of the story, but the fact is, This puzzle is quite difficult to assemble even with the burr tools file so I was in for a lot more puzzling.

It probably took me another couple of hours, but I eventually did manage to get this thing together. There was one particularly challenging move, that may frustrate folks. It involved putting two halves of the skull together – which I had to attempt a few times to get it right. One of the halves is pretty secure with only a couple of pieces that can fall out, but the other half must be held, clutched with a tenuous grip, while you try to join the halves without any pieces slipping out of your grasp. I eventually resorted to using little bits of scotch tape in strategic areas to hold certain pieces in place. Be careful with this technique though, because later on those little pieces of tape may prevent critical moves and shifts in the puzzle.

It’s not only hard to put together, it’s hard to photograph!

But, overall, the puzzle is doable – It’s kind of like assembling a very difficult lego set – where the pieces don’t always stay together. And I have to say, I’m surprised at how much fun I had following along with the burr tools file. It’s really quite ingenious how the pieces all lock together. And the end result is fantastic. The skull is solid, with a nice weight and a quality feel. this one is going to look great on display.

Thus far in my puzzling career, this has been the first puzzle that I’ve utilized Burr Tools to solve. As such, I expected to feel a bit disappointed in myself, but surprisingly, I don’t feel that way at all. In fact, I had a great experience learning more about the Burr Tools program, and still had lots of fun putting this puzzle together. It’s quite a marvel how all these pieces link together into such a solid unit. I can’t wait to put it up on the puzzle shelf as I’m sure it will receive a lot of comments. Overall, great fun, challenging moves and a standout appearance!

Notes – Tamas Vanyo

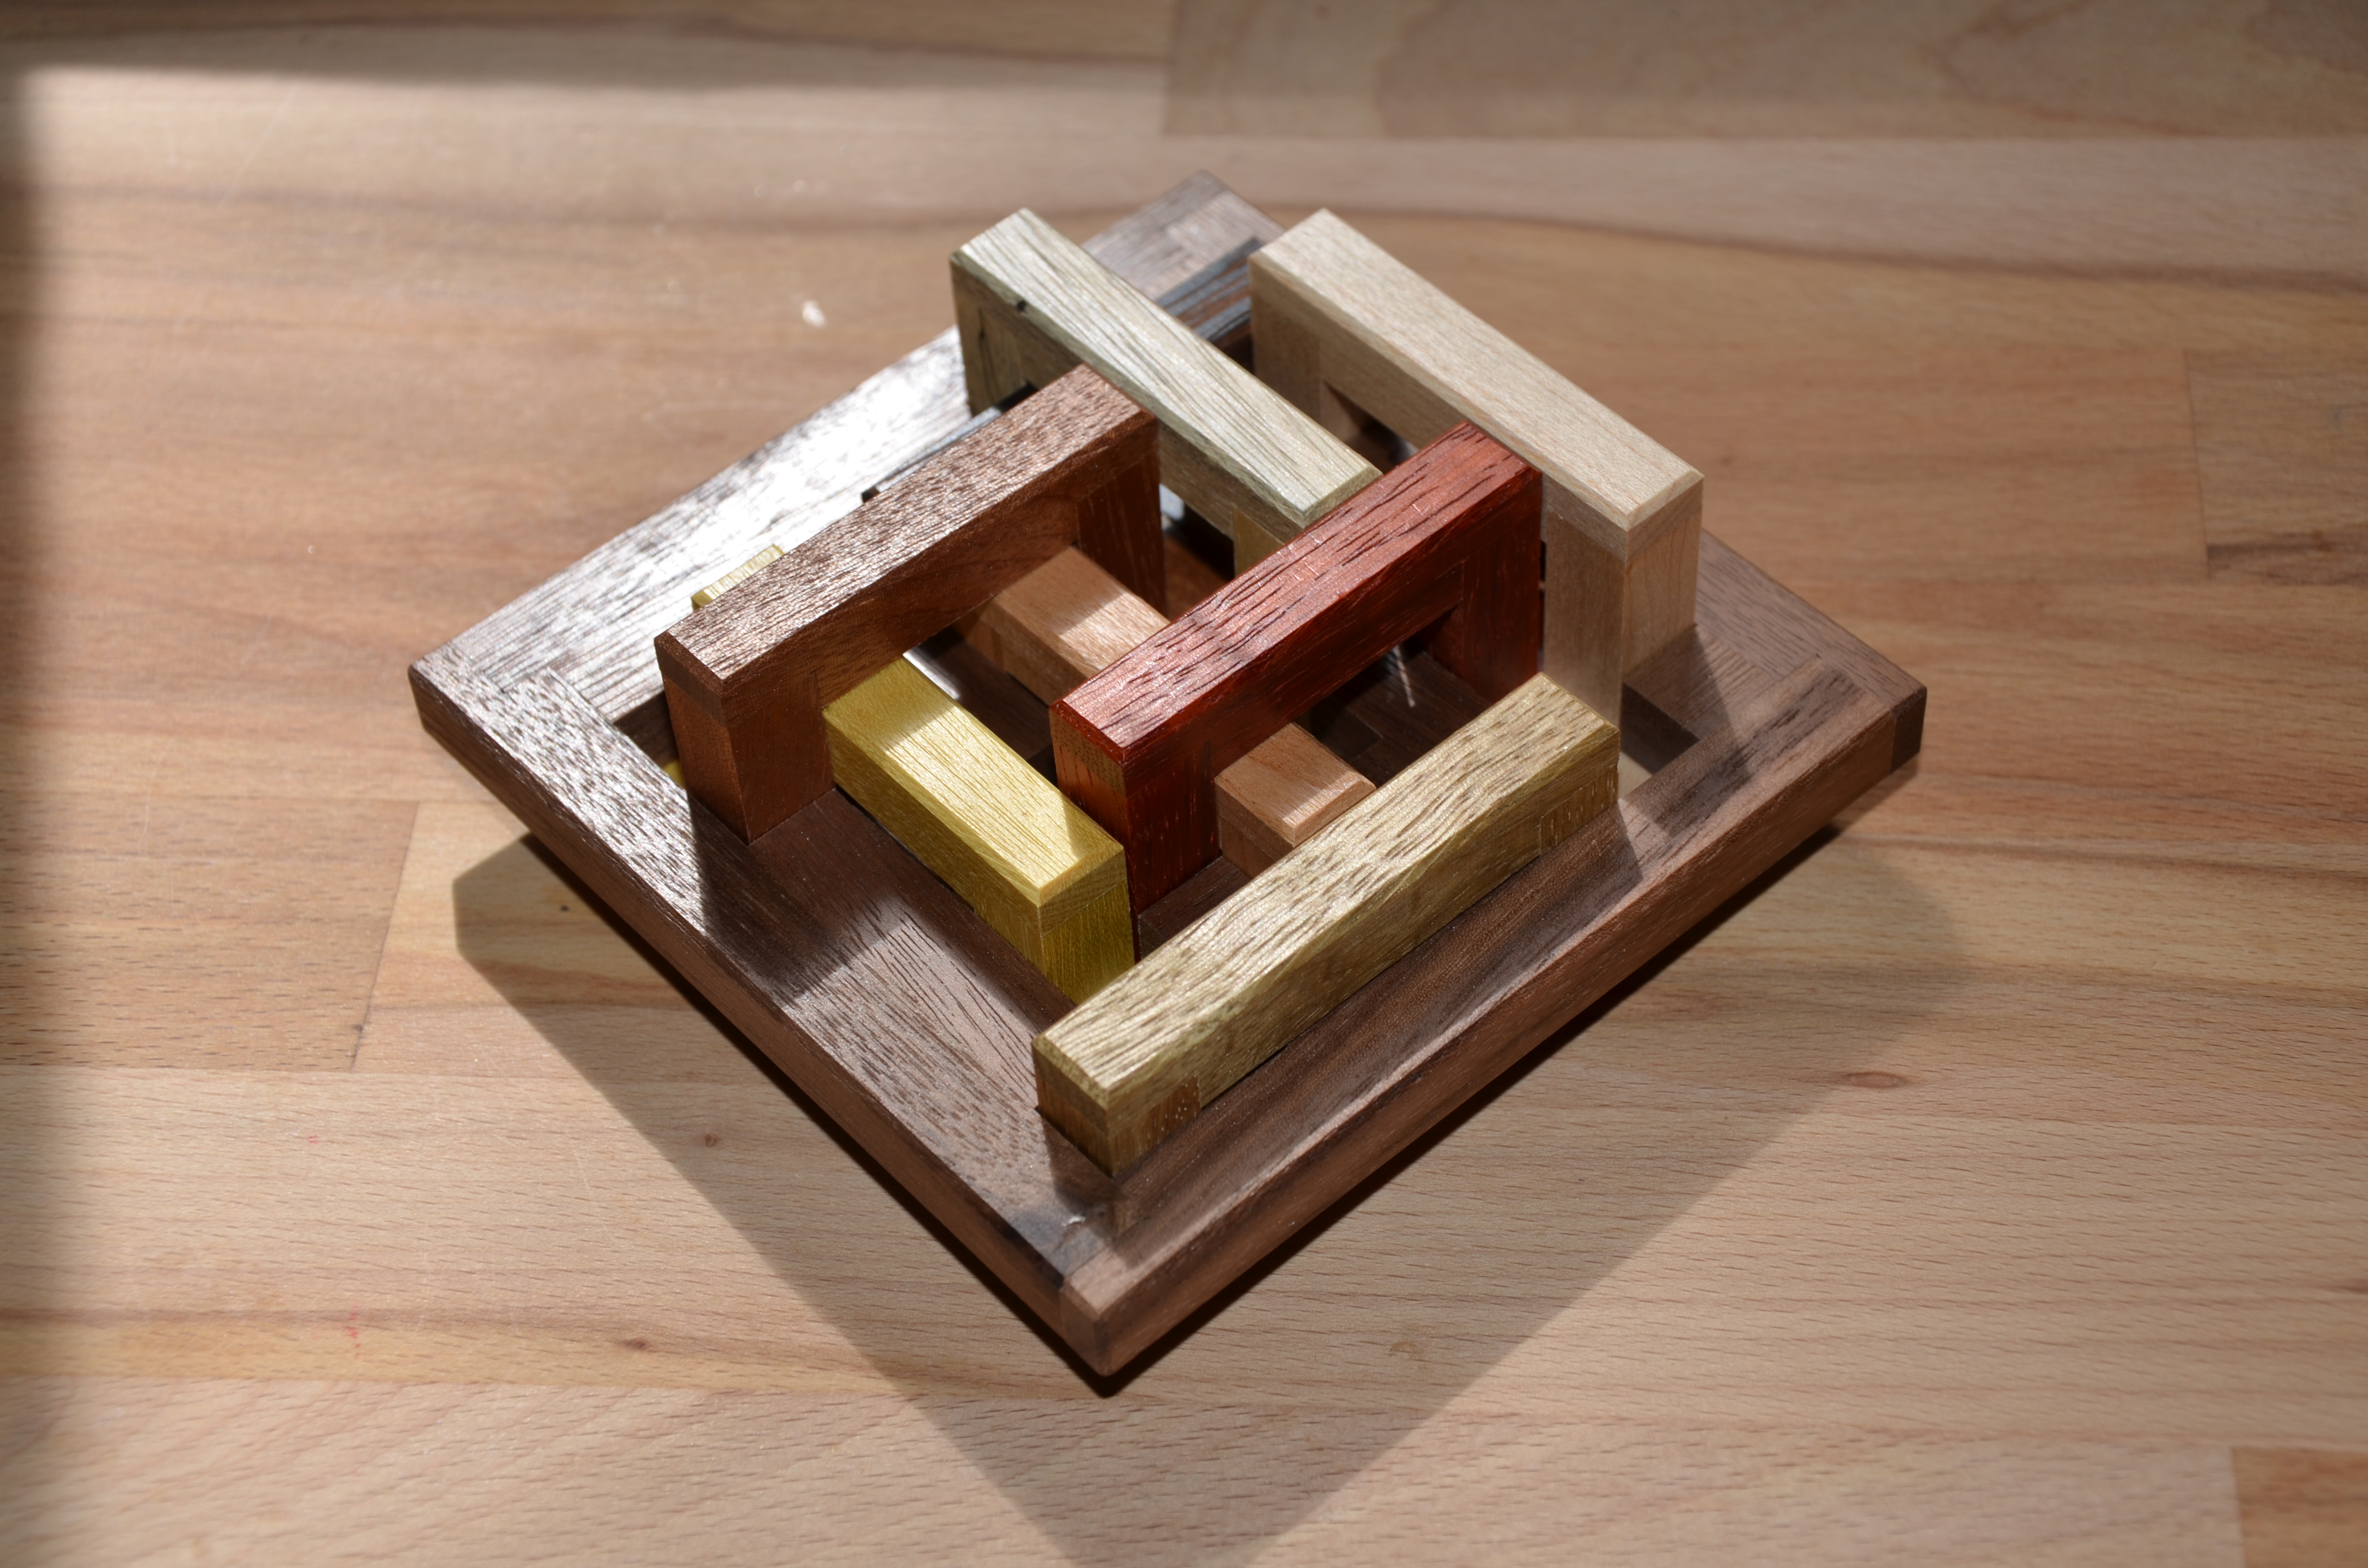
This week, I’m working with Notes, designed by Tamas Vanyo and created by Eric Fuller at Cubicdissection.com This puzzle is unlike anything else in my collection. It is comprised of a large wooden frame and 8 “U-shaped” pieces or “notes” that interlock with each other and the frame. Its really quite a unique and beautiful puzzle. The 8 “notes” all utilize different wood types with an end result being a wonderful mosaic of wood types.

The beautiful mosaic of squares looks amazing

There are essentially two distinct sides to this puzzle. One side is the “feet” of the 8 pieces. It is comprised on 16 squares that are flush with one another. The other side contains all the “bridges” between the feet. Some of these bridges overlap each other and some do not. When held with the “feet” up, the puzzle is nicely contained and the 16 squares look very interesting and intriguing. However, if the puzzle is then flipped over, the pieces all fall loose and start to shift – some of them are even close to falling out at this point. So, one must handle this puzzle carefully because it is easy to get it all out of sorts without intending to do so.

The puzzle just about falls apart when flipped over. This makes manipulating the pieces a challenge.

One of the first challenges is determining how to manipulate this puzzle. Since it is easy to unintentionally move pieces, I’ve decided to work it with the feet facing upward. That way gravity is hopefully not as much of a factor.

Well, the first piece came out very easily and has me wondering if all the puzzles will be that easy to remove or whether there is more of a challenge ahead. We shall see.

And the puzzle is completely apart. Oh my. I should feel happy, but I’m in fact quite scared. You see, I turned the puzzle over and the parts were fairly intricately connected there at the end and I was manipulating things and the puzzle shifted and pieces just started falling out. Now I have to recreate that intricate web in order to get these pieces back together. It’s clear to me that the challenge isn’t disassembly, but rather putting this mess back together.

The puzzle has been disassembled, now the real challenge begins.

Well, I’ve been working for only a few minutes aided by the photo of the assembled puzzle and I now have 5/8 pieces put back into the frame and it hasn’t been too difficult. I’ve had to remove and replace a few and swap the order of insertion, but otherwise its been very doable. We shall see if the final 3 pieces present any more challenge.

Whew. I now have 6/8 pieces back in the frame and that last one wasn’t so easy. It wasn’t too difficult in terms of “how” to complete the moves, it was more of a problem of holding all the pieces in place whilst inserting the new piece. It seems the best way to adjust the position of the pieces is to move them up and down – outside of the frame – this makes it hard to keep their orientation to each other. Let’s see if I can get the next piece in.

Gah. The final 2 pieces don’t want to go in. It appears that this is going to take a bit more time and exploration to determine what order the pieces need to go into the puzzle. I’m also trying to determine if they all enter the frame “bridge” first or if some enter “foot” first. I’m gonna keep hammering away to see if I can get this together.

Well, 30 more minutes in and I haven’t managed to get the final pieces in. I believe that I have things out of order and am not sure how to fix it. I guess I have to backtrack and see if I can get these pieces into the puzzle somewhere else in the sequence.

Yes! I finally got it put together. It took me another 20 minutes or so of careful consideration and I also had to backtrack a few moves to find a spot to slide in that troublesome piece. But, in the end, with enough manipulation, the piece finally slid into place and then the last piece was trivial.

The thing is – My solution was very sloppy. The disassembly was sloppy and the assembly was sloppy. None of it consisted of specific moves – it was more of an entanglement puzzle for me. I don’t even know how I could break down what I did into a specific number of moves.

So, I want to do it again. This time, instead of turning it over to release the pieces in an uncoordinated mass, I’m going to see if I can specifically slide and raise/lower the pieces to find a more elegant solution.

In the end, I managed a somewhat more elegant solution, but it still wasn’t really made up of specific logical moves. Instead, I shifted the “notes” around which opened up gaps in which I was able to remove some pieces. Some of the times I twisted a “note” to get it out and that didn’t necessarily feel like a correct move. The problem is, that when the pieces are away from the frame, there is nothing to keep them from rotating, thus it would be very hard to actually do this puzzle while keeping all the pieces on a perfect grid.

The second attempt – You can see this piece easily lifts out – but another piece has to rotate for this to be possible – is this an intended solution?

Overall, I enjoyed this puzzle because it was very different from anything I’ve worked on before. At the same time I was a bit disappointed because I had a hard time solving this puzzle with what I think is the intended solution. Not because it was difficult, but because the pieces tended to shift and rotate which pushed me towards what felt like sloppy solutions. I think that if the “notes” were somehow held more inline and in a grid – if perhaps they were contained in more of a box, then the intended “dance” of the “notes” would have been more noticeable and enjoyable.

Casino – Dr. Volker Latussek

Last Friday, I received a shipment from Cubicdissection.com with 6 different puzzles including Casino, Split Maze Burr and Cranium. It was a hard decision which one to write about because I so desperately wanted to play with them all! In the end, I chose Casino. I have never done it before and I’ve heard great things, so off we go!

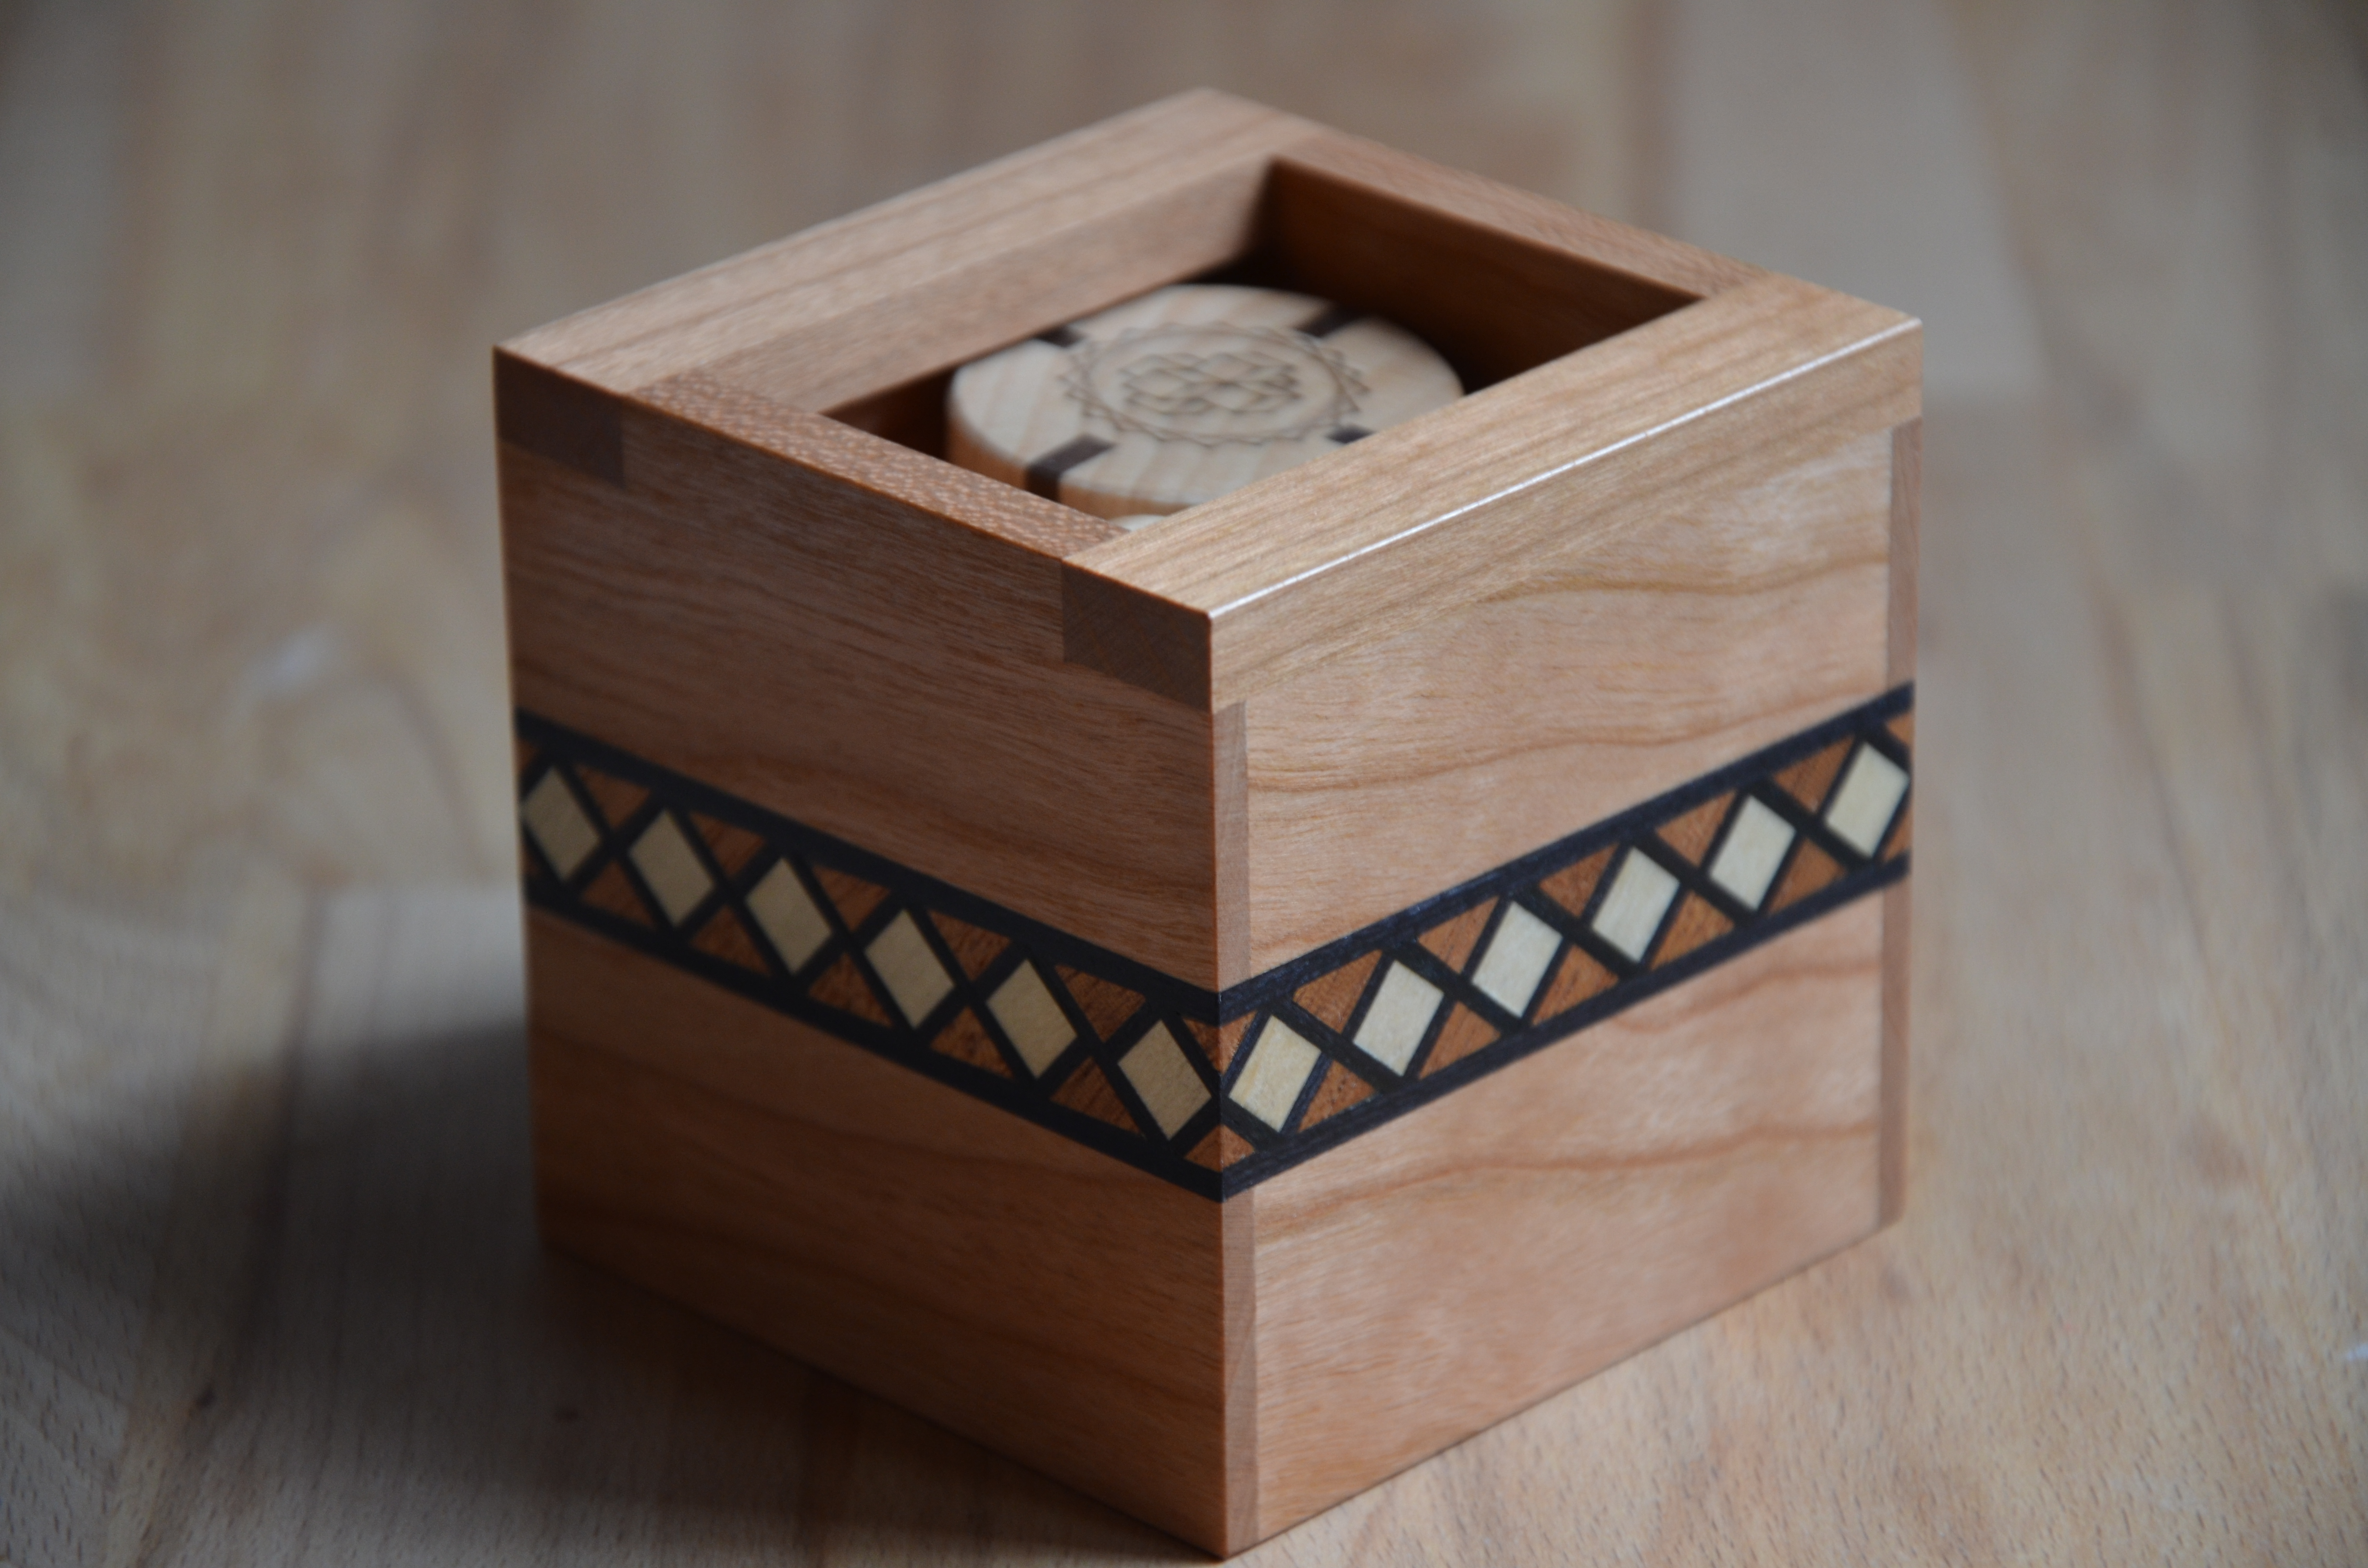
First off – Wow! This puzzle is supremely gorgeous. It definitely got the Eric Fuller mega-upgrade treatment and it turned out spectacular! I love the inlay – the alternating Walnut and Maple look so clean and stylish and really stand out against the Cherry Box. The chips are equally well-made and the whole experience of handling this puzzle is really just top notch.

The puzzle consists of a box and 6 chips which must be placed inside the box. Its very easy to get 5 chips in, but that 6th one doesn’t fit. The round shapes don’t work very well with packing and the box has a little lip on two sides that frustratingly interferes with everything.

Place the 6 coins into the box. What a gorgeous puzzle. Wow!

Well I’ve only been playing around for about 15 minutes, but feel like I’m real close to a solution. I can see how all the chips should fit into the box, but one of the pieces is just a few centimeters shy of fitting in the opening. I really thought I had it solved there for a second, but I guess I need a more calculated approach.

And after another 15 minutes, I feel lost. I removed the pieces and I’m not sure that I have things correct anymore. There was a moment were I really could visualize where the pieces should go, but now, I’ve lost the image and I no longer see.

Its easy to get 5 pieces in, but that 6th one just doesn’t want to fit!

Ok, another few minutes and I’m back to the beginning again. I can see the solution. I can visualize where the chips need to go. I just can’t get them there. There has to be a sequence of moves to accomplish what I want because the old “force it in” trick isn’t doing the job.

..And Done! Yee haw! That was pretty exciting there. I was hot on the trail of the solution from the beginning and pretty quickly was able to determine the position the chips needed to be in. But, there’s definitely a delightful little trick to getting them into position. It seems a lot of packing puzzles have a similar type of trick. There’s always a little adjustment that needs to be made and a sequence that needs to be considered. Sometimes pieces have to be “pre-loaded” before they are utilized in a move.

Solved. I tried to get a low angle shot so as not to spoil the solution.

But what a fun little puzzle this was. I’m a little sad that I’ve solved is so quickly, but it will be a great puzzle on the shelf and a perfect “family-stumper” puzzle that I can pull out and hand off to anyone up for the challenge.

Its such a nice puzzle because it’s so accessible. And in fact, so are all of Latussek’s puzzles that I’ve worked with. I recently picked up Tower of London and Bastille from Rombol.de and both of those share a lot in common with Casino. Latussek just has a way of working with round pieces and creating interesting packing problems that are simple in concept, very approachable but deceptively difficult.

It’s interesting because I think it’s the roundness of the pieces that make these puzzles what they are. At first the round pieces seemed very different to me, as compared to typical square puzzle pieces, and so I didn’t know quite how to approach these puzzles. I was thrown off by the roundness you could say. But in the end, I kind of forced myself to ignore the shape of the pieces and instead focus on the orientation, position and sequence.

Casino is a great puzzle, I can see why it is so popular. If you enjoyed it, then you should check out Tower of London and Bastille over at Rombol.de – maybe if we are lucky, Eric will get permission on those too!

2 Rings – Chi-Ren Chen

2 Rings is a puzzle that was made by Eric Fuller and was sold back in October. The October batch of puzzles at cubicdissection was especially strong and it seems to me that this puzzle didn’t receive the attention it deserved. I wanted to make sure I got this writeup in before it got lost in the never-ending wave of new puzzles.

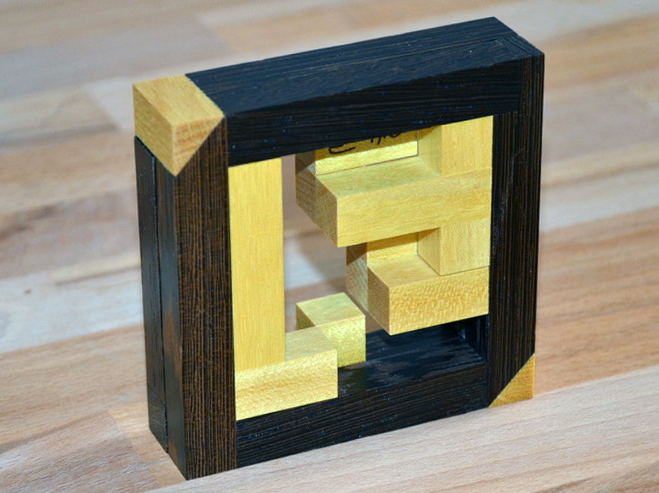
Straight out of the gate, this puzzle is stunning. The wood choices are spot on and the craftsmanship is truly impressive. Eric spliced in these strengthening corner pieces (sorry don’t know the technical term) that add great accents, but also create an extremely strong and rigid frame. This is important with this puzzle because it is very easy to accidentally generate a lot of leverage and force while manipulating the two pieces. I can imagine that this exact puzzle built with lesser standards might snap or break if someone torqued on it enough.

Wonderful construction. Beautiful. Strong. Functional.

Outside of the beautiful aesthetics, this is also a very fun puzzle to play with. I didn’t find it too difficult, but I really enjoyed that it stretched my thinking. There was something exciting about rotating the pieces in a 3 dimensional space and navigating this 3 dimensional maze. I also really like the fact that the puzzle has open sight lines. So many puzzles hide their movements inside a box, but here you can see everything and freely rotate the puzzle to view from all angles.

The puzzle arrived in a “incorrectly” completed state – that is, the two rings were together, but they were incorrectly oriented and the magnets were resisting each other. The first step was then to separate the rings. This was not too difficult of a challenge, but I wasn’t done yet. I still had to correctly assemble the rings. I made several attempts and several times found myself back at the beginning.

There is an obvious spot where the two rings can connect and disconnect. I found myself connecting them together, manipulating the rings through several moves and rotations to the point where I felt I was going to solve it – and then, suddenly, I’d be back at the connect/disconnect spot. Hmm. How frustrating!

After a few more attempts, I finally found my way to the end of the puzzle and that satisfying “snap” as the magnets came together. I would guess that there are a few separate solutions for this puzzle, and I’m not sure of the exact moves I used. I just kept moving forward and eventually found the solution.

As a kid, I always loved mazes and this puzzle brought me back to those roots. The two pieces have to be manipulated correctly through a sort of 3d maze. Since the magnets are visible, it is fairly obvious what the completed state will look like, so the difficulty lies in the journey to the completed state, which, in my mind, was very similar to solving a maze. Manipulate the pieces until a dead end is reached – backtrack to the previous junction, try the other path and continue on and on until the end.

Fun movements as the two rings rotate and interact with each other

Solving this puzzle is great – the two rings really “snap” together as the high strength magnets find each other. The magnets also make the first move very tricky to find when disassembling the puzzle. I’ve had this one sitting on the shelf for a few weeks and each time I pick it up, it takes me a few minutes to find the first move. It takes some real force in one specific direction to break them free.

To me this puzzle acts as a proof of concept. I think it is a clever idea with unique manipulations, but I also think that the idea could evolve into something even better. I’d love to see what “3 rings” would look like, or what if the voxels were smaller, or what if the faces were curved to invite unique rotations? I really think there could be many future possibilities using this same concept of open, interlocked rings.

The two rings – separated. Magnets are visible on the exposed ends

Okto Cube – Yavuz Demirhan

Today, we have another beauty from Eric over at Cubicdissection.com. This one is called Okto Cube and was designed by Yavuz Demirhan. This particular puzzle immediately caught my eye when it was listed, and I was very excited to work on it. I love the looks of it and it was equally fun to manipulate and discover it’s secrets.

This is a six piece board burr encased in an eight piece cube. The cube pieces are made out of solid wood which gives this puzzle an overall weight that is pleasing and the boards are well made and strong.

Solving this puzzle took a while. I brought it with me on Thanksgiving vacation, hoping that I would have some quiet evenings to work on it. Well, I didn’t have many quiet evenings, but I did get to work on it extensively, which was great.

I had played with this puzzle a handful of times before I made any real progress. I could move a few of the burr pieces, but always hit the same dead end. Eventually, I discovered that it wasn’t a dead end after all. Once in the “dead end” position, I found that the signed burr piece could move freely. I had missed this move because its quite easy for the pieces to bind up a little. I often had to pull on board pieces to make sure they were fully extended before manipulating the next piece. It seems to loosen up after a bit of use, but is something to watch out for.

Once, the signed burr piece moved, I was then able to remove 2 of the cube pieces, which was a very cool (and scary) moment. I was expecting the puzzle to fall apart at this point, but that wasn’t the case at all, in fact, I had a long way to go.

The Signed board makes an appearance and one cube is removed.

Removing the 2 cube pieces revealed more of the interior and allowed me to see just how complex this puzzle is. There sure are lots of moving parts! I continued to manipulate the puzzle and was able to remove the first board piece. Soon after, I found that 2 more cubes were ready to fall off. Awesome! This thing is really fun.

4 cubes and a board removed. This puzzle is fun!

I continued to manipulate the parts feeling certain that I was close to the end. But no.. the puzzle still held secrets for me to unravel. I persevered and after a bit more manipulation and I removed 2 more cubes! I was now down to the final 2 cubes!

This is where things got really interesting for me. I was working on the puzzle in front of the tv, sitting with family, and I just didn’t have the focus I needed. I began to worry that I wouldn’t be able to get it back together again! I was hoping that the final 2 cubes would come off easily, but that wasn’t the case. I was having to do more movements than I could keep track of and I made the decision to stop and reassemble. Bah! I always seem to do this. Luckily, I was able to get the puzzle back together, but I was a bit ashamed that I didn’t finish it.

I ended my vacation and flew home defeated. I had come so close to the solution, but didn’t quite get there. 

Well, last night, I sat down, determined to redeem myself and finally solve this puzzle. I progressed through all the stages and once again found myself with the final 2 cube pieces attached to 4 burrs. I slowed myself down and analyzed the situation. There were a surprising amount of available moves and positions that I could find and eventually, I tried a combination of positions not previously attempted and voila! The 2 remaining cubes slid right off! Disassembling the final 4 burr pieces was not trivial either, but I got it done.

Okto Cube Disassembled

Whew! That was an awesome puzzle! 

But.. it wasn’t over yet. I still had to assemble the puzzle. Interestingly, I didn’t have much trouble on the assembly. I think that my aborted attempt during thanksgiving vacation had given me a better understanding of the moves required, and so assembly felt rather easy. I think the most difficult part was getting it started. For some reason, I seem to have trouble assembling the initial 4 burr pieces. But once that is complete and I had slid on the first two cubes, it was all downhill from there. 

I’ve since solved this puzzle a couple of times. I had to take some pictures and also wanted to better understand the mechanics behind it all. It is truly a remarkable puzzle and it is very repeatable once you understand the required positions. This is now one of my favorite puzzles! Check it out if you can!

Okto Cube looking all dramatic in the light

— SPOILERS BELOW. —

Two Face 3 – Alfons Eyckmans

This week, I have another fantastic burr puzzle created by Eric Fuller and designed by Alfons Eyckmans. This one is called Two Face 3 and is one special puzzle – I’m still reeling from having just completed it.

To begin with, this puzzle is a beautiful work of art. Its visual appearance is stunning – the construction is superb and the choice of woods really elevates the whole design. It’s a 6 piece burr, but unique in that there are two outer cages that can move independently of each other. The inner cage has a few strategically placed cubes and cutouts that combine to make this not only a difficult puzzle, but also a very clever one. The construction of the cages is incredibly sturdy and they fit together very tightly making for a very solid feeling puzzle.

Beautiful construction and and high difficulty make this puzzle shine

The overall design is very clever. The use of two cages is not just for looks either, it factors into the solution. 

This was another intimidating puzzle for me. It sat on the shelf for a couple of weeks before I started to tinker with it, and then it was another week until I really decided to put some effort into it. Whether it’s intimidation or a desire to relish the puzzle as long as possible, I find that sometimes, I’m just content to let it sit. Maybe I don’t want the experience to be over, so I procrastinate a bit, I let the puzzle breath like a fine wine, until that perfect moment arrives and then I sit down with a job to do.

And so, I finally sat down with this one last week and began to seriously work on it. I began exploring different moves and discovered some typical burr-type moves, but didn’t make any real progress. I kept going in circles, with no real progress made.

Going in circles moving pieces around

I spent a number of sessions doing this. Moving pieces, feeling like progress was made only to find myself back at the beginning. Early sessions like this are enjoyable to me – I don’t really want to solve it quickly, I just want to enjoy the experience for a while and Two Face 3 really delivered the goods. But, that said, after a certain number of sessions, i start to feel like I need to make some more progress – so, I increase my focus and start trying abnormal moves.

This yielded some success for me as I discovered an interesting placement for one of the pieces. Surely I was on to something here! But, even with this new discovery, I couldn’t make any progress. I was able to revert back to the beginning position and then repeat the move, but it still didn’t yield any solution. 

After a few more sessions, I discovered a similar move at another location and then knew I was making progress. But, to my dismay, the solution still wasn’t there. Man, this puzzle really takes some work! I spent another day working various moves but couldn’t make progress. I had to be on the right track didn’t I?

Well, one morning, I took the half-solved puzzle to work with me and sat there fiddling with the pieces when suddenly, one fell out! Holy crap! I didn’t expect that, but apparently I had done the right thing and was rewarded. I spent the next 15 minutes carefully removing the remaining pieces and then bathed in glory as I examined all the pieces and marveled at the craftsmanship.

Then, fear set in. I went from joyful elation to fear. I was so happy to have solved the puzzle that I forgot to pay attention to the orientation and position of the 2 cages and the burr pieces. I didn’t really think about the fact that the 2 cages could be put together in 8 different ways… and if they weren’t put together correctly, then there’s no way the burr pieces would fit… How on earth was I going to get this thing back together…?

All the pieces have been removed! Halfway there!

Well, the good news was I had taken various photos while tinkering with the puzzle. So, I went back and took a look at those photos and was able to deduce the orientation and placement of the 2 cages – phew – crisis averted. Although, that would have made one heck of a challenge – to start with this puzzle completely disassembled and go from there. Maybe one day..

Anyway, even though I had the orientation of the cages documented, I still didn’t know how to reassemble this thing. I did keep track of the order in which I removed the burr pieces, and that would prove helpful, but it wouldn’t move the puzzle for me.

In the end it took me at least another 3 hours to put it back together. It’s a tricky puzzle and requires a very specific sequence to solve it. Interestingly, I employed a rotation to put it back together – I’m not convinced that it was entirely necessary, but at a certain point, rotating the burr piece allowed another piece to move where I wanted it and then I rotated the original piece back. Again, not sure if it was necessary, but I remember playing with a rotation when disassembling too, so perhaps it is required.

This may be the most difficult burr puzzle I’ve ever solved and I thoroughly enjoyed it. I’m not eager to solve it again anytime soon, but I do think I will revisit it one day and see if I can get a better handle on how it works. Highly recommended if you enjoy this type of puzzle – and there are even some left at cubicdissection.com

Pack 3 – Osanori Yamamoto

This week, I tackle the Pack 3 designed by Osanori Yamamoto and crafted by Eric over at Cubic Dissection. This one had me tearing out my hair, screaming into the night and storming around the house. My family was concerned for my well being and I attribute last night’s nightmares to this diabolical puzzle.

I’m clearly not very good at packing puzzles – in fact a majority of my unsolved puzzles on the shelf are of the packing variety. I’m not sure why they don’t click with my brain, but they are always a struggle – and Pack 3 was one of the worst (or best?) that I’ve worked on.

This particular puzzle is so deceptively simple and that may be what lead to my frustration. It consists of a beautifully crafted box with a unique opening along with 3 simple looking pieces. All you have to do is stick those pieces into the box. It should be simple, but it is not. The description says “The level 8.2.2 solution is satisfying without being too frustrating.” Well, I’d agree with the satisfying part, but for me, this was extremely frustrating, I dubbed it “the box from hell” along with other more colorful, non-family appropriate names.

This puzzle arrived along with 6 others the other day and I naively started work on it thinking – “I’ll start with the easiest of the bunch!” So, I casually began tinkering with the pieces, trying to insert them into the box. I spent 5 minutes here and 5 minutes there trying haphazardly to cram them all in. But, it didn’t work – furthermore, I couldn’t wrap my head around the idea that it required 8 moves with the first piece. How could that be? 8 moves seemed like way too many for the options I was faced with.

All you have to do is stick those 3 pieces into that box!

Within about an hour, I had a solution – only my solution was 2.1.3 and it left a visible gap. The solution didn’t feel right or satisfying and clearly didn’t match up with the description so I fired an email off to cubic dissection to see if I had done it correctly. The reply came back shortly after “You are close but that is not the correct solution.” Ugh, well on one hand I was happy to continue working on it, but on the other, I had hoped that it was correct. Back to the drawing board.

For two days, I worked on this thing. I was obsessed, I was driven, I was thinking about it in my sleep. I focused all my energy, I used all my logic and I failed over and over again. I decided to get systematic and try every possible combination of inserting the pieces, whether they were logical or not, I had to cross off all the non-working ideas and focus on what was left, but again, I failed. I cried, I cursed, I put it back on the shelf, but I couldn’t just walk away. I had to solve it.

One of the many ways to incorrectly pack the puzzle together.

And then, after setting it down and picking it up over and over, I finally saw the light. I was so in tune with the geometry of the pieces and the box that I literally solved it in my head while staring at it. Finally, I smiled and pronounced “I’ve got it!” And sure enough, just like that, I put the pieces in and solve this wicked and cruel little puzzle. The feeling was tremendous and the 2 days worth of built up tension was finally released. Ahhhhh. 

What a wonderful little puzzle! Yes, I wanted to burn it with fire and smash it with a hammer but now that I have solved it, I feel nothing but pure joy. It’s truly astonishing how many possible variations there are to work through. It is, without doubt, the most frustrating and rewarding 3 piece puzzle I’ve every worked on. I can’t wait to spring this on an unsuspecting friend. I will giggle with delight as they struggle with every possible combination they can think of. Awesome puzzle. Now… on to the next!

The completed puzzle. Beautifully constructed.

Prison Burr – Stephane Chomine

Ah, the Prison Burr, another fine creation constructed by the fine folks at Cubicdissection. Did I mention that I really, really like the puzzles from Cubicdissection? Pretty much everything I have bought from them is heirloom quality, challenging and fun!

Today, I writing about the Prison Burr. This intimidating puzzle is sort of like a standard 6 piece burr, however, there is no access to the bottom of the puzzle and all the pieces are contained in a cage – which makes it very challenging indeed. This one sat on the shelf for a number of weeks as I solved other puzzles and made excuses as to why I didn’t have the time or focus to work on it. Well, I knew that eventually, I’d have to give it a go, so a couple weeks ago I sat down with the intention of solving it.

Look at that beauty!

The thing is, this is one complex puzzle and as stated earlier, I was intimidated. I was able to remove the first piece easily enough, but the second piece involved lots of maneuvering and every time I felt that I was making progress, I chickened out and returned it to the start. My main fear was that I’d never be able to get it back together again, and by the time I started making progress, I was too deep for my brain to remember the moves. Maybe I should just “go for it” and deal with the consequences later, but that’s not how I like to do puzzles. I prefer to keep track of the movements the first time I solve it. Later on subsequent efforts, I am more inclined to let myself get lost.

Well, the day finally came, where I had enough time to really work on this thing. I was determined to move forward at all costs and get this thing solved once and for all. 

I have to say, I really, really enjoyed this puzzle. The movements are great, there are multiple dead ends and the puzzle stays challenging to the final piece.

The first piece is rather trivial to remove, but it doesn’t help much. Removing the first piece does allow for a view of the interior, which is helpful, but the second piece is far trickier to remove. I went down many paths and found a few dead ends, but eventually felt that I was getting closer to the correct moves. After many trials, I was brave enough to pull out the second piece. Here we go! No turning back now!

Removal of the 3rd piece is even trickier. Even now, I know the order of removal, but it is still awfully difficult to get that 3rd piece out. I’ve now solved this puzzle multiple times, but its always that 3rd piece that causes me grief. And to make matters worse, once the 3rd piece is removed, it is still difficult to remove the 4th. In fact, this puzzle just doesn’t get any easier. Usually, the 2nd piece is the corner stone and it all comes apart easily afterwards, but not with the Prison Burr. This thing brings it until the end. You would think that with only 3 pieces left, it would be easy, but it’s not. The final 2 pieces are definitely easier to remove, but they still take a some specific moves.

The photos don’t do it any justice. This thing is built like a tank and super difficult.

And then, there is the reassembly. It’s not easy. Not at all. Getting the first 3 pieces back in correctly is quite difficult – I can’t imagine solving this one without knowing the order of the pieces. Even armed with that knowledge, this thing is very challenging.

Well, I’ve talked about how difficult this puzzle is, but I also was to talk about how rewarding it is. I’m really very happy with this puzzle. In fact, I have solved it several times now and while I’m getting more familiar with the necessary moves, It still gives me great joy to complete it.

Part of that joy comes from the wonderful construction. At $75, this is an expensive puzzle, but if you have even the most basic knowledge of carpentry, it is easy to justify the cost. The construction of this is spectacular. Its not flashy with exotic wood choices, but the cage is a marvel of perfectly mitered pieces and where burr puzzles can be “sticky” and hard to manipulate, the movements here are smooth and precise.

Overall, I am so happy to have this in my collection. This is definitely a test-piece for the savvy puzzler. I would highly recommend it if you want a challenge!

Aquarius+ – Stephane Chomine

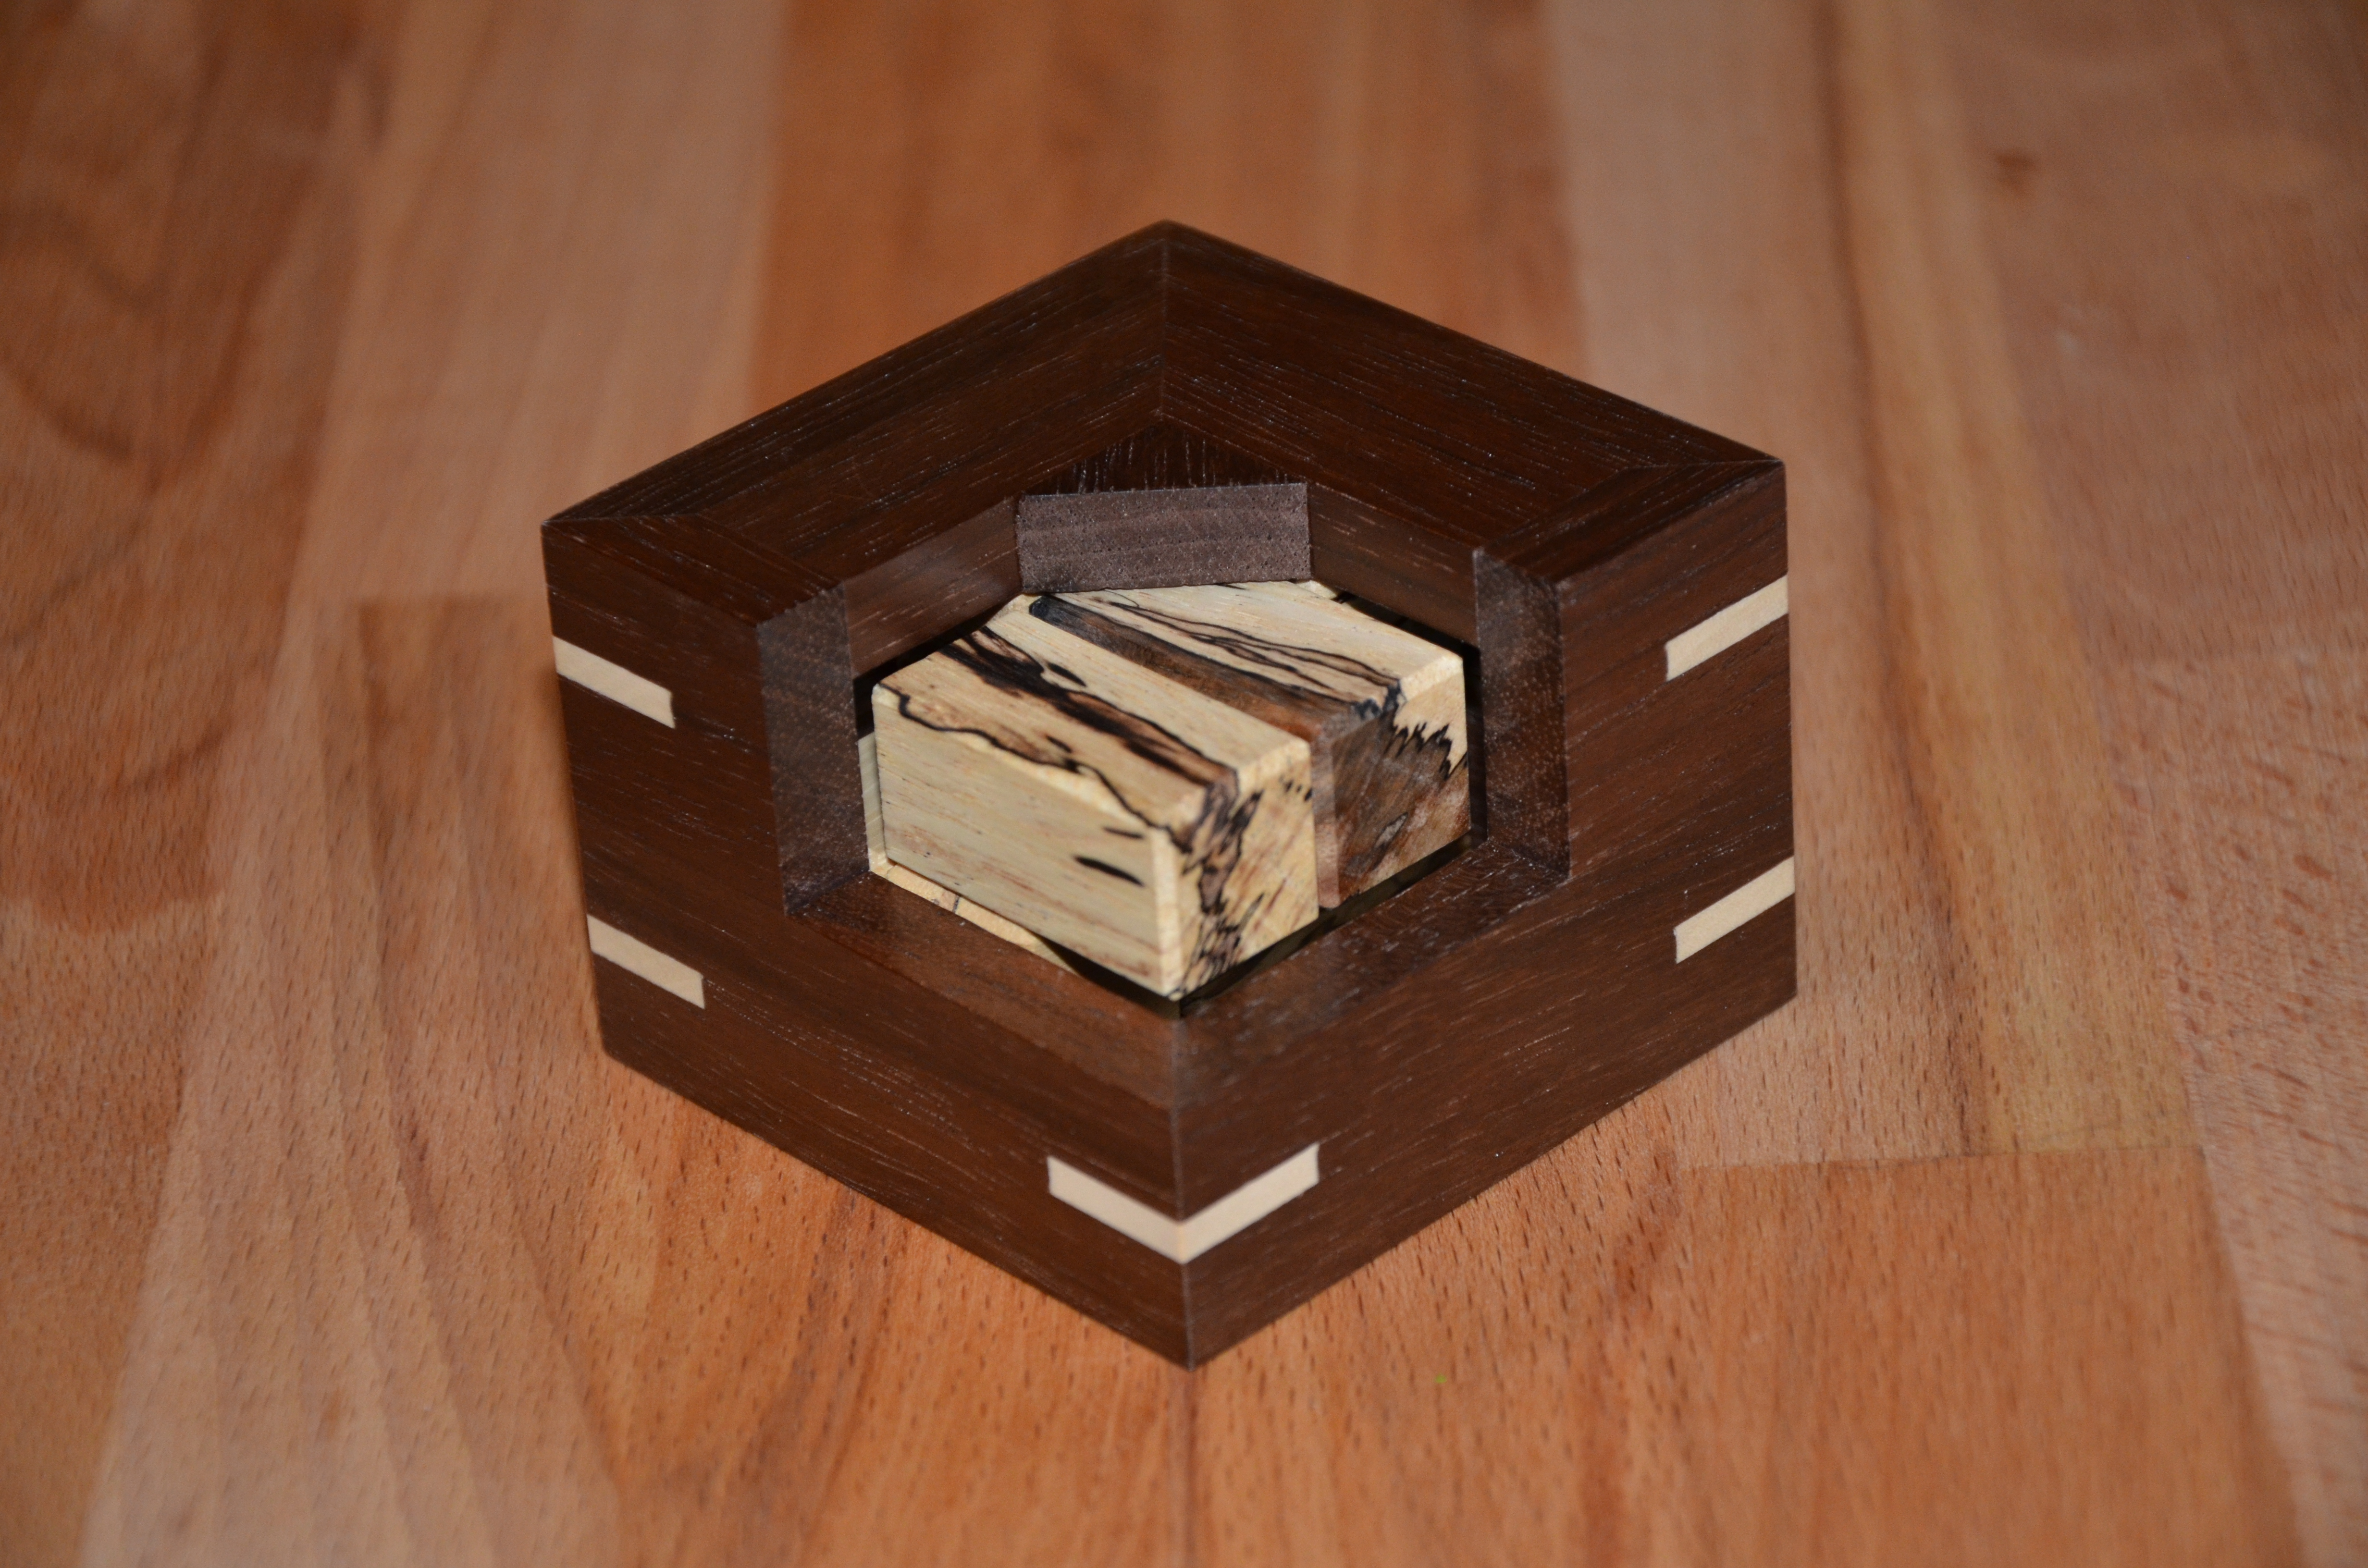
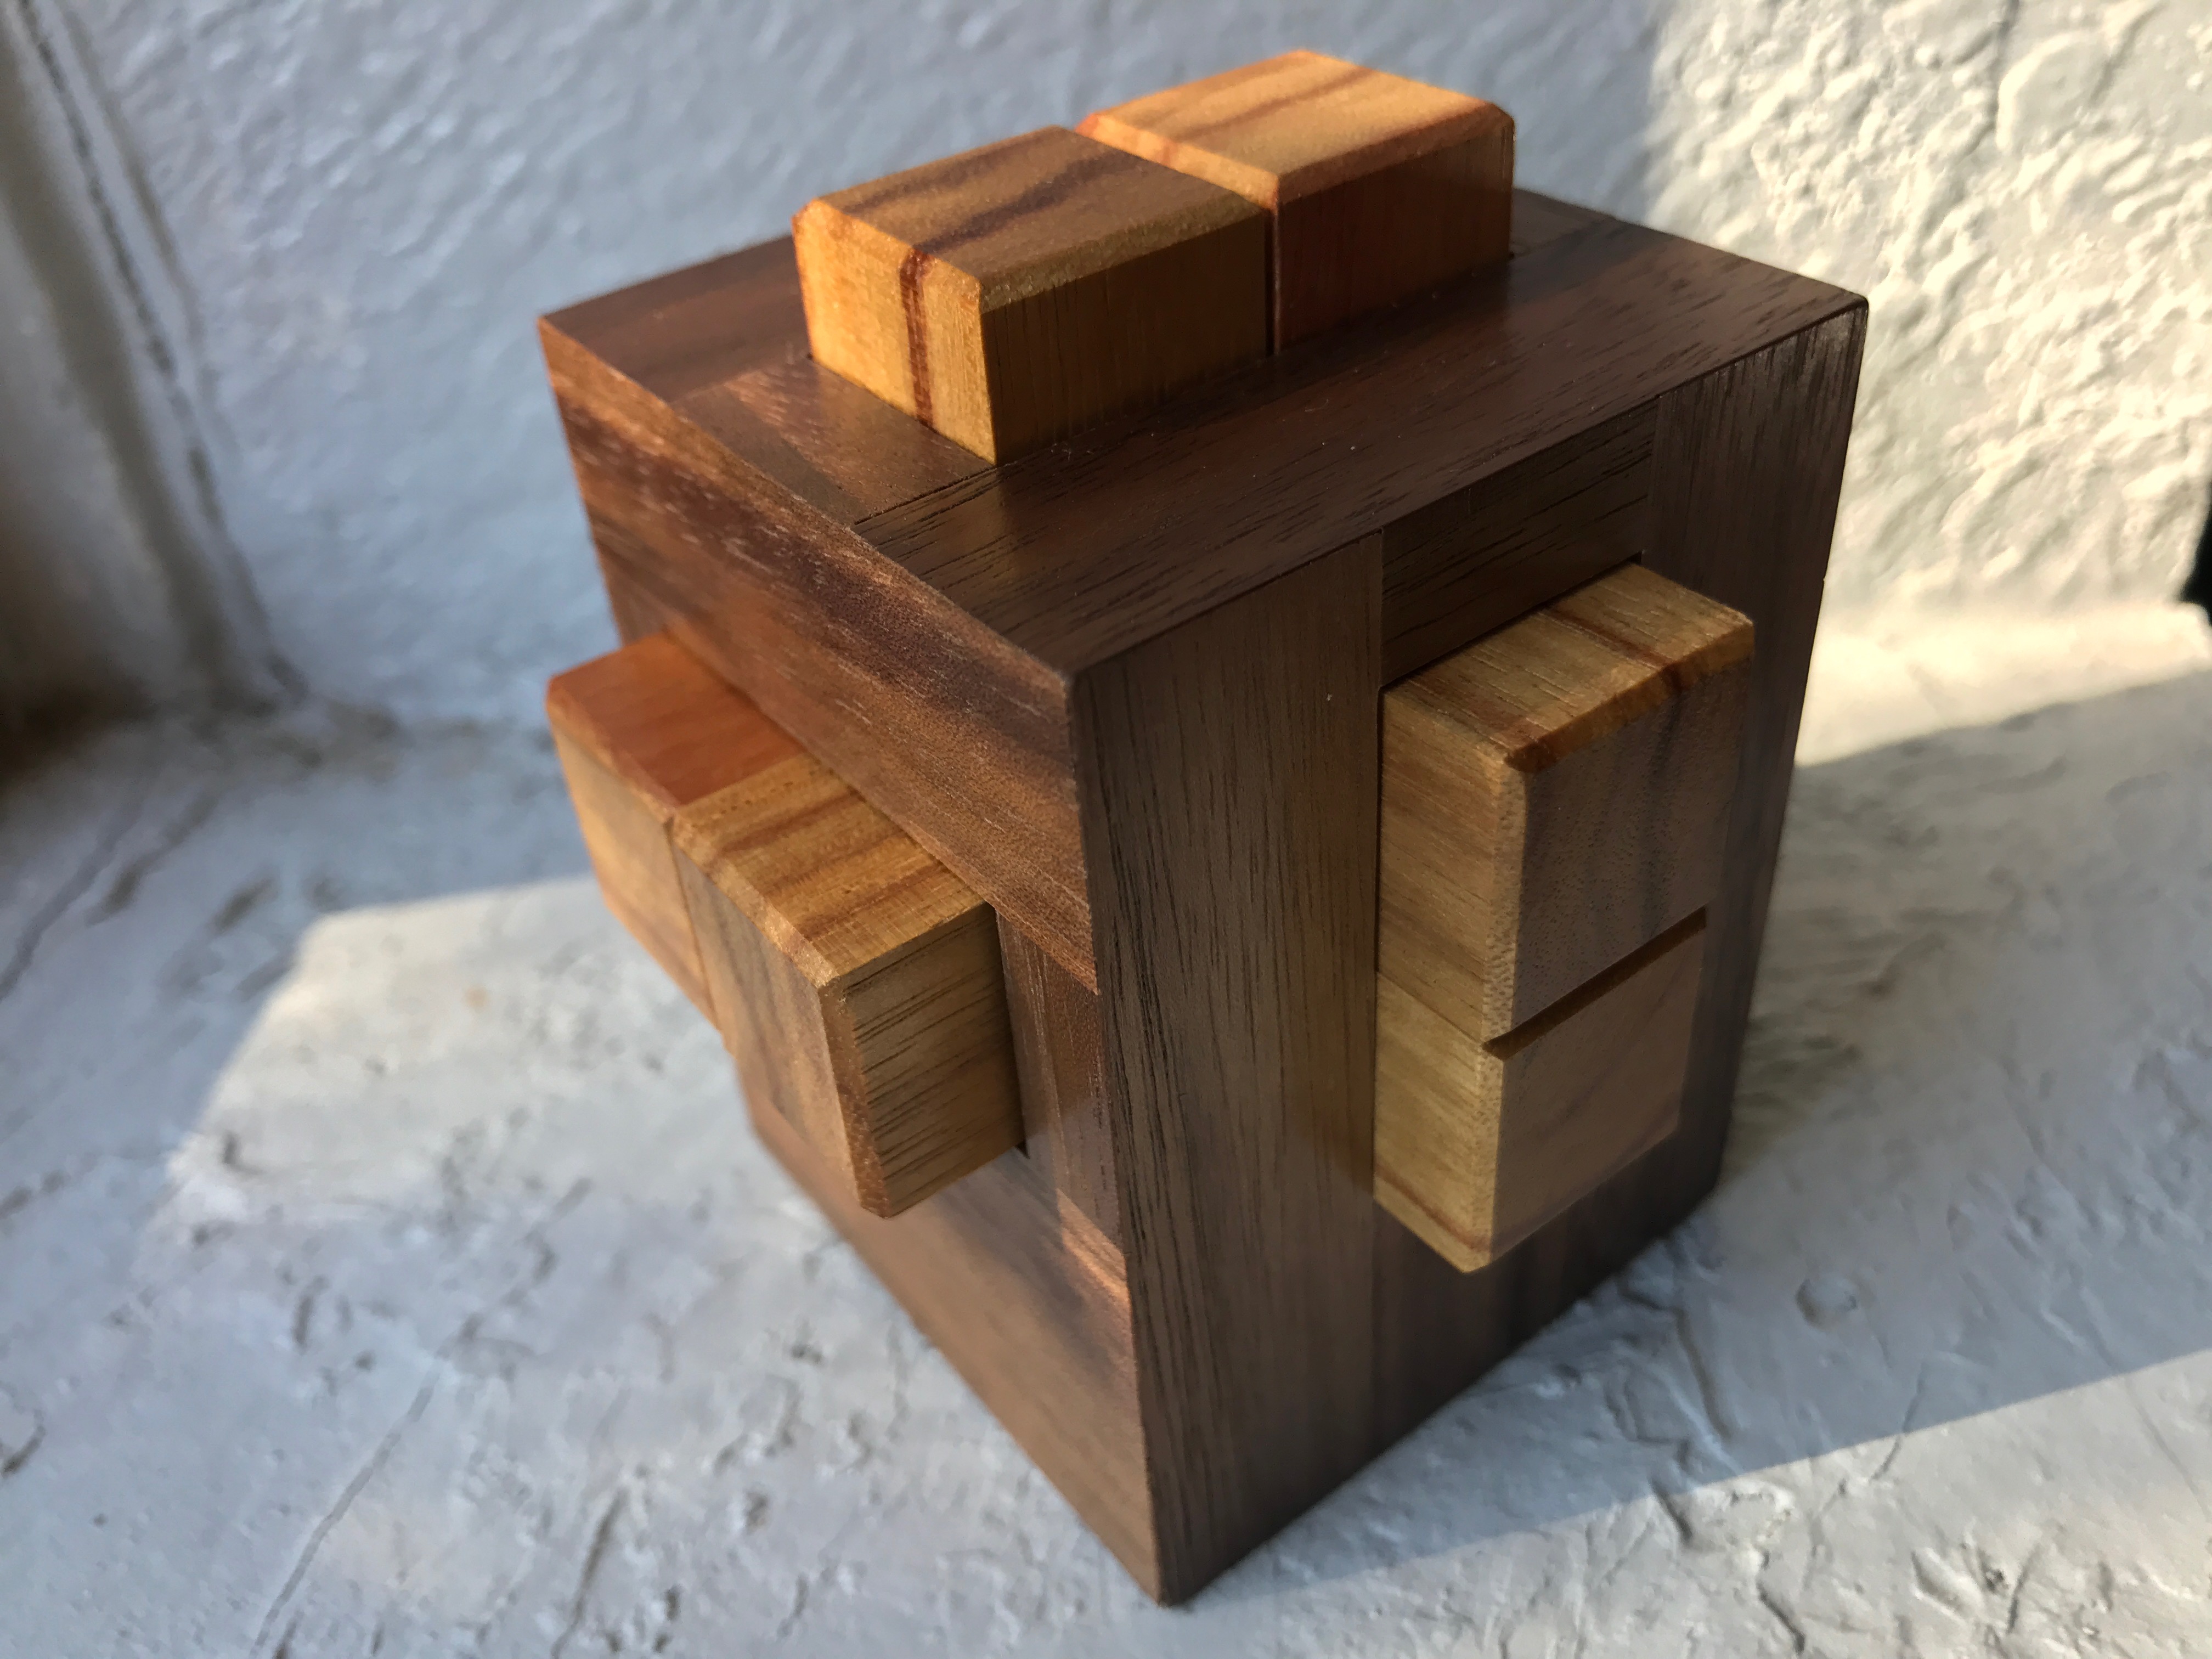
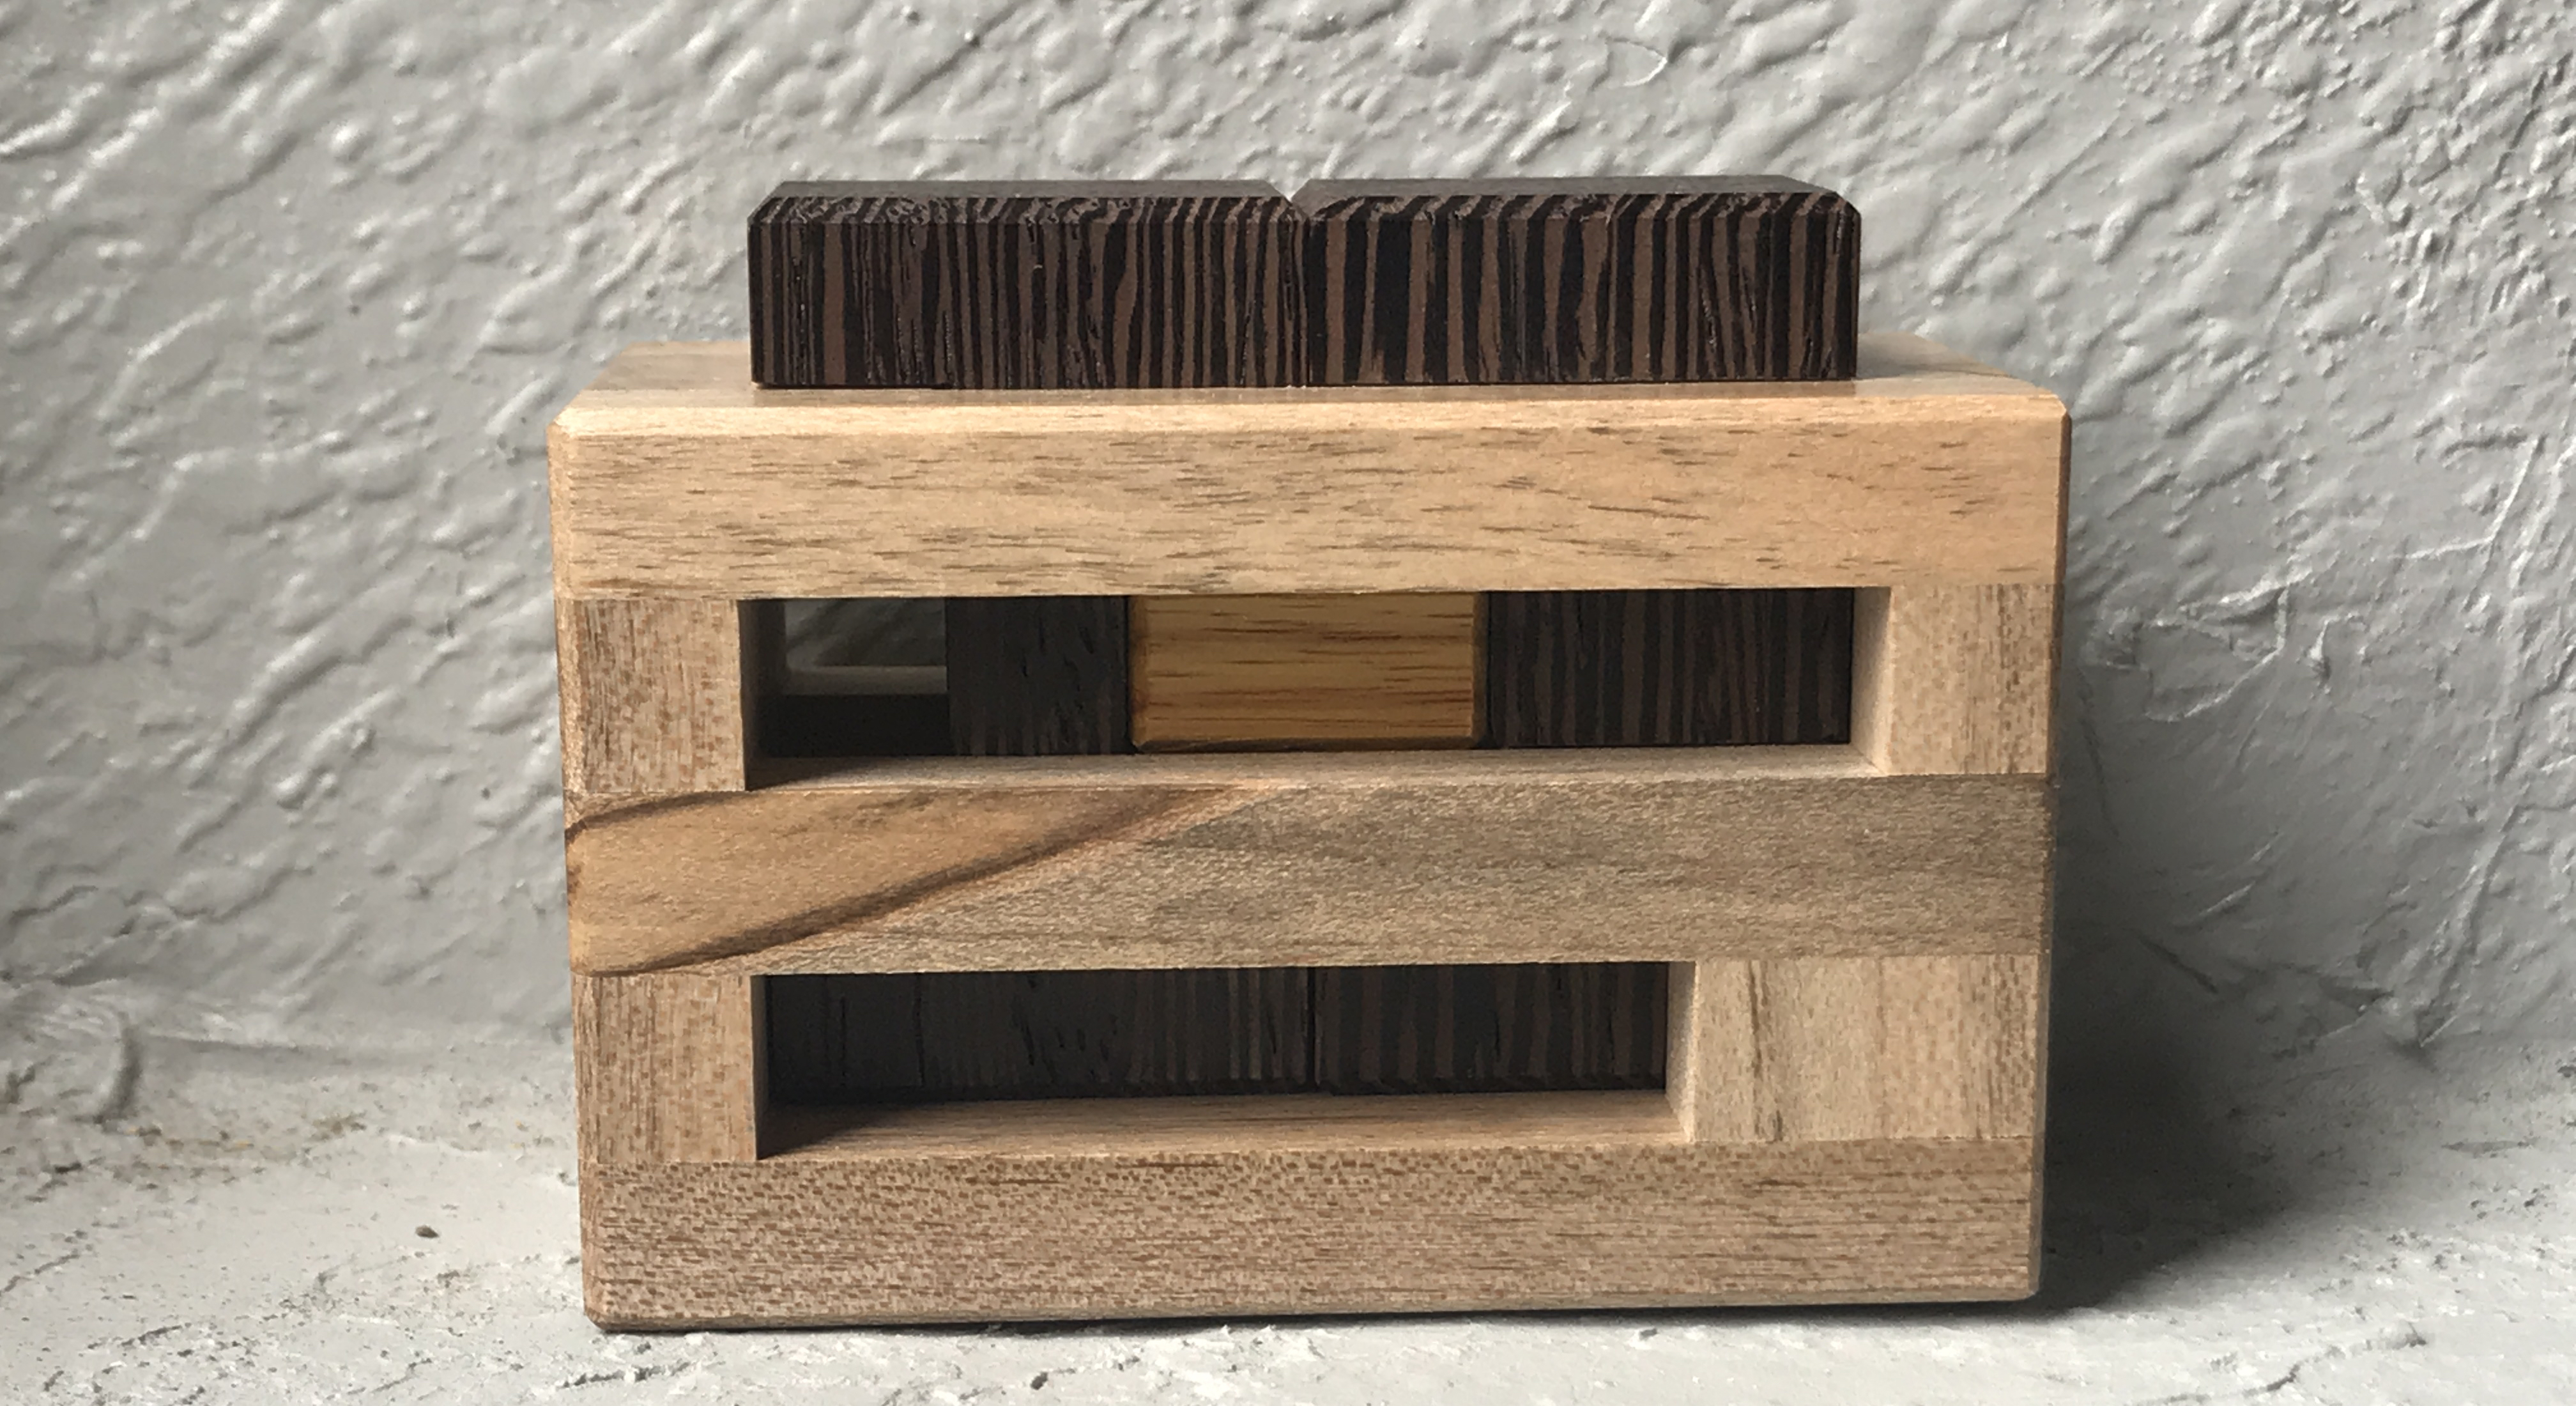
Ok. tonight I have the Aquarius+ designed by Stephane Chomine and crafted by Cubic Dissection. This puzzle is smaller than I envisioned, but it is far more beautiful than expected. The striped wenge grain on the two burr pieces is just georgeous and the inclusion of a smaller slider piece is fascinating. I received 3 puzzles in this shipment and I was drawn to this one first. I can’t wait to get started.

Well 5 minutes in and I very well may be screwed. I was trying to keep track of the movements and manipulations but I quickly lost track of what was happening and that cute little slider piece is now pretty loose inside this thing and I think I can prolly just shake it out, but I’m not exactly sure how it got to where it is now, so I’m contemplating whether to push forward and solve the puzzle or whether to try to backtrack a step in order to not lose track of the movements… 

At 10 minutes in, I’ve now reset the puzzle. Whew. I’m not sure how close I was to the solution, but I realized that I never really looked very hard at the starting position, so I’m glad to have gotten it back to where I can now start a little more methodical in my approach. Back at it.

At 15:56 I got the little slider piece out. There is actually a surprising amount of room in this puzzle to move the burr pieces around. I’m not exactly sure what the sequence of moves were to free the slider, but hopefully, I’ll be able to re-insert it during assembly and sort of nudge it back into place similar to how I got it out… Lets see how easy the burr pieces are to remove..

Turns out removing the burr pieces is trivial once the slider is out. And so there it is, solved and laid bare for me to examine. The scary part is… Its not exactly clear how this puzzle should be reassembled – that is – even though I studied the starting position a bit, I’m not entirely sure which orientation the pieces need to be.. which makes the prospects of re-assembly… scary.

All pieces removed. 

Well, I was able to put the puzzle back together after a bit of work – at least I think I got it back to the starting position – unfortunately, I can’t seem to find any photos online of what this puzzle looks like in the completed state, so if there are multiple possible configurations, I may not have it done correctly.

Which leads to my next thought – Does this puzzle really require a 17.9.3 solution? I do not believe that it took 17 moves to take out the first piece. It was more like 6-7 moves and then a bit of jostling to free the slider. Maybe I am completely off with my solution and analysis, but I didn’t find it nearly as difficult as the rating would suggest.

My other criticism lies in the manipulation of the small slider. It is not easy to manipulate and in the end, I used a toothpick to reach into the cage and help position the slider. Perhaps there is a solution that involves moving the burr pieces around to shift the position of the slider?

Overall, this really is a beautiful puzzle – and I like the idea of using a smaller scale piece in the puzzle – in fact, I’d like to see more puzzles use different sized pieces. But I do think this puzzle falls a little short when compared to the other offerings at cubic dissection. The build quality is not quite as good (burr pieces have grooves and saw marks). And having to manipulate and rotate the slider within the cage didn’t feel like solving a puzzle, it felt more like chance.

If anyone else has worked on this puzzle, please let me know of your experience. I’d like to know if I missed something or not.


Bramble Box – Noah Prettyman

Today, I have another stunning puzzle from Cubicdissection.com. This one is called Bramble Box and it was designed by Noah Prettyman and boy is it beautiful.

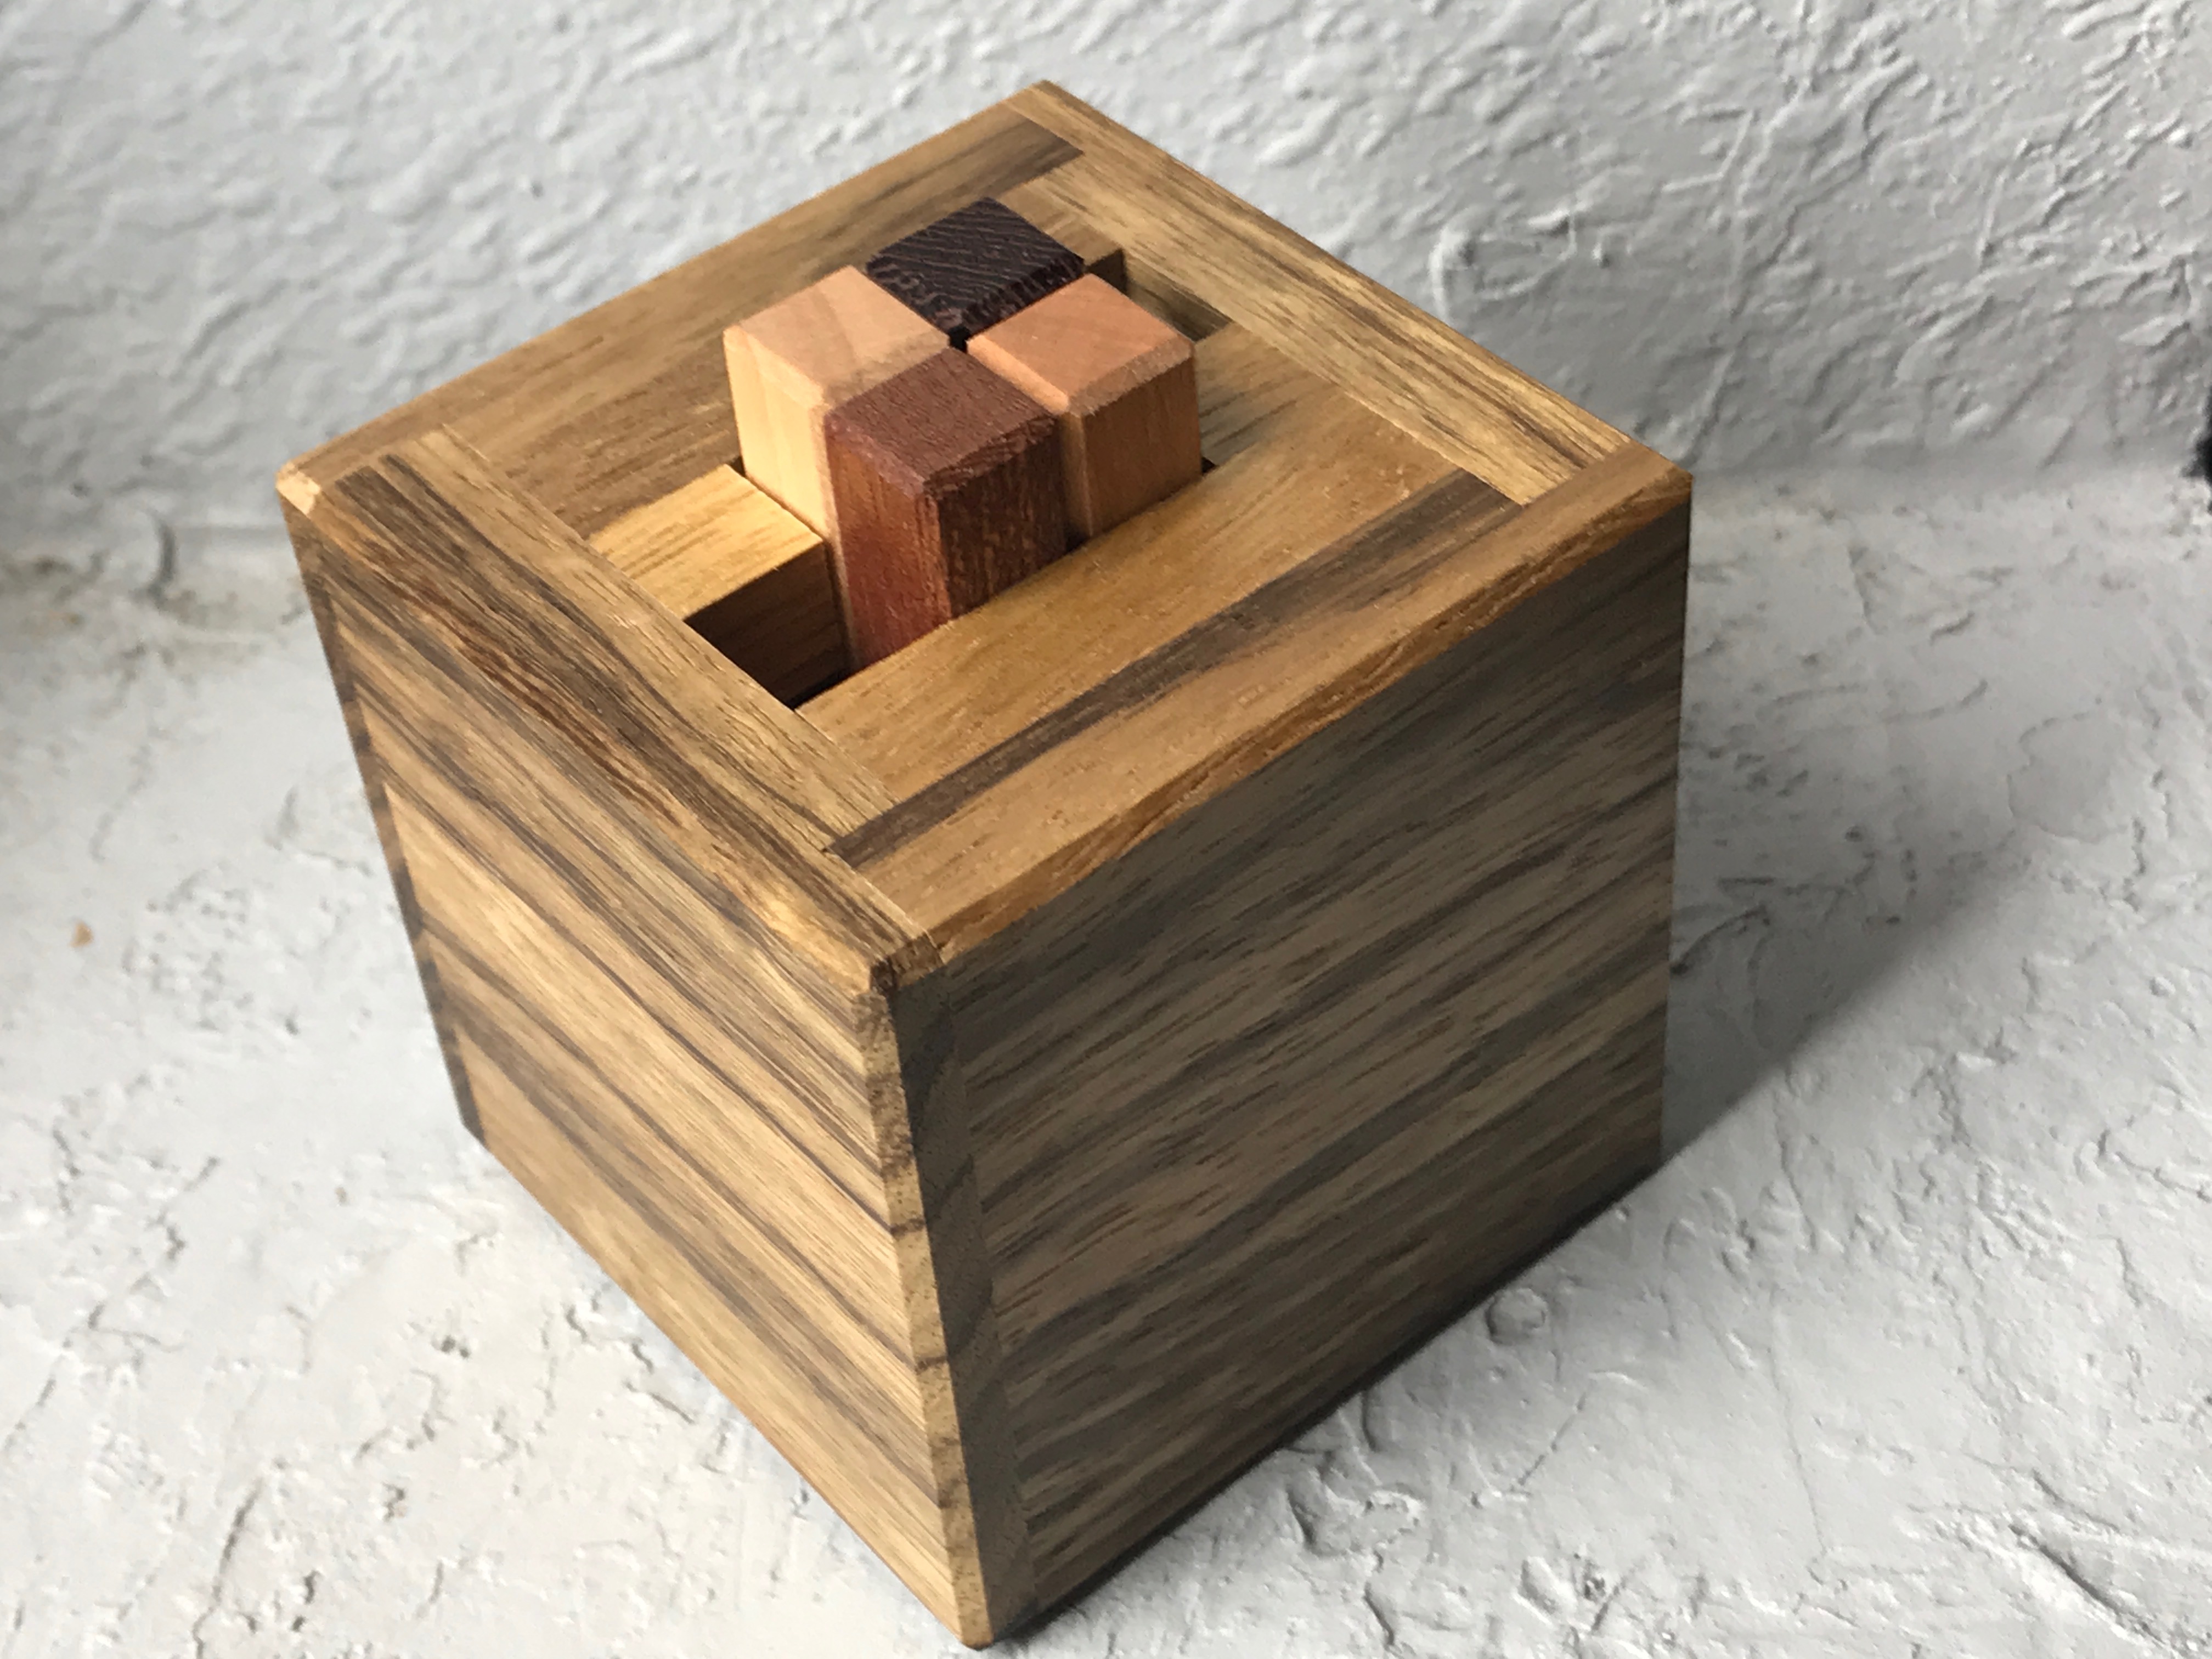
This puzzle is comprised of a Black Limba box and 4 pieces of different wood types that are stuck inside. The object is to free the pieces and then re-assemble the puzzle. I very much enjoyed playing with this and working it out. The 4 pieces have interesting knobs and protrusions and the box itself has a restricted opening on the top and bottom. Right off the bat, all the pieces are moveable, so there is no need to unlock anything, however, since all pieces are moveable from the start, there are also many possible opening moves. 

Manipulating one of the pieces

I took my time with this puzzle solving it over the period of a few days. I didn’t find it too difficult, but I did find it very enjoyable. Removing the second piece actually took longer than expected, and I discovered a potential short cut if rotations are allowed which makes things easier.

The pieces have been removed! Fun movements and solution.

Reassembly is a bit tricky. It’s not super obvious how the pieces go back together and I was stuck for a while figuring out how to manipulate two pieces in particular around each other. I had to solve the puzzle several more times before I really understood the movements.

Overall, a great puzzle that is all about unlocking that first piece. The build quality is spectacular and I’m very pleased to have this one in my collection.